A small buying guide and photography tips to assist you in making the right purchases to photograph daytime long exposures. Using strong neutral density filters will allow you to shoot 1-5 minute exposures during the day depending on the conditions. If you’re bored with photography, neutral density filters are a great way to rejuvenate your hobby and get passionate again.

It can be rewarding but also sometimes challenging as you’re forced to look at a scene from the perspective of how a long exposure will transform it. This guide should help guide you on what equipment you will need if you want to shoot daylight long exposure photography and a few photography tips on how to calculate the long exposure shutter speed.
Why
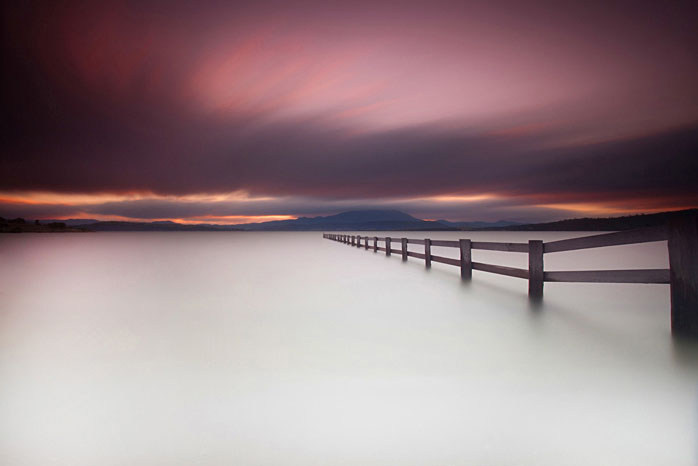
Using heavy neutral density filters like the ones I later recommend, allows you to manipulate a scene with various effects such as the blurring of clouds and water. Others have experimented with busy cityscapes such as Piccalilli Circus to blur people and traffic, giving a sense of an empty city. The nd filters aren’t limited to these effects, you may want to look at what others are doing with strong neutral density filters on Flickr.
Below are images showing how a daylight long exposure through the use of nd filters can greatly change a scene
 |
 |
 |
 |
What You’ll Need
Neutral Density Filter

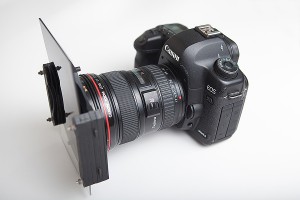
A neutral density filter is a dark filter which is placed over the front of a camera lens. This reduces the amount of light coming into the lens thus allowing you to obtain longer exposure times. As the filter is very dark, this requires you to compose and focus before screwing the filter onto the lens. I enjoy this as it forces me to take greater care in composing my image so I don’t have to waste time unscrewing the filter, recomposing and reapplying the filters.
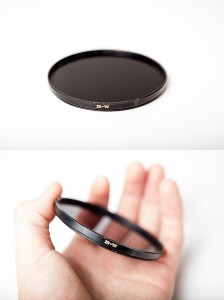
There are 2 and 4 stop neutral density filters available, I’d suggest something strong like the Hoya 9 stop or B+W 10 stop filter below. This is because when shooting during the day there is a lot of light available which means a 2 or 4 stop filter probably won’t cut it during the day.
| Hoya NDX400 9 stop neutral density filter | OR | B+W 110 or sometimes referred as the 110 nd, is a 10 stop neutral density filter |

You may also wish to consider the Hoya infrared filter or go the DIY route with making your own 14 stop neutral density filter from welding glass (click). Although I’d suggest sticking with the B+W 110 which I personally use or Hoya NDX400.
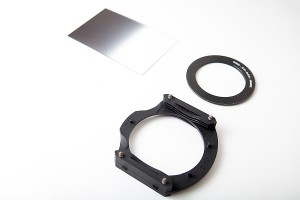
While not a necessity, graduated neutral density filters are great for controlling the exposure on the sky to avoid over exposure. I own the Cokin Z-Pro graduated neutral density filter set-up and use it 80% of the time for my photographs. More about graduated nd filters here.
| Lee Neutral Density Graduated Kit | OR | Cokin Z-Pro Neutral Density Graduated Kit |
Shutter Release
As your exposures will often exceed 30 seconds, this requires using the camera bulb mode and a shutter release to obtain long exposure times.
| Canon RS-80N3 | OR | Budget Chinese alternative from eBay. |
Also available are intervalometer remotes. This allows you to manually set the exposure time from 1 second to 99 hours, capture images in a set interval or set a delay before the camera begins its exposure. I personally own the Nikos remote and have used it for other purposes such as capturing timelapse clips and also interval star trail long exposures. I particular like that you can buy separate cables for the remote to use with other camera brands, which is great if you decide to change brands down the track.
| Nikos intervalometer remote as reviewed by Martin Pot is available from eBay. | OR | Canon intervalometer remote TC-80N3 |
Tripod
Obviously an essential item to minimise shake and ensure a sharp image.
I won’t go into recommendations for individual tripod legs and heads, there’s so many different products on the market so I will leave it to you.
Benro, Gitzo and Manfrotto are good reputable brands worth considering.
Calculating the Exposure
Best Kept Secret Photography has compiled a helpful neutral density reference chart to assist you in calculating exposure times for when shooting with nd filters. I’ve uploaded this into PDF so you can print and add it to your camera bag, download it here.
I hope these long exposure photography tips have helped. If you have any questions please leave a comment or email me and I’d be happy to help.
Also just to be open with you all, product links are to my Adorama affiliate account. Buying through my link doesn’t cost you anything but does mean you support my blog. Many thanks in advance if you do decide to purchase through my affiliate link.
Thanks for reading 🙂


Great post Alex, top info!
Great tip!!! I like doing seascapes and this can also be acomplished (blurring of water and clouds) by setting your ISO
to 50 and using a two stop polarizer. Thanks Alex, and please
include me in your newsletter.
Thanks Jose! You have a stunning gallery 🙂 You can subscribe to updates of my blog through this page. Thanks again.
Great write up Alex! You are a master in your own world!
Keep up the good work! 🙂
Thanks Benjamin! I hope the light painting is progressing along nicely. You’ll have to send through some more shots 🙂
Yeah it is! I shot you an email just moments ago! I am trying to focus more on landscapes/waterscapes so needed some of your master advice! 🙂
Nice article, any thoughts on single vs double vs multi-coating for the hoya nd filters?
Thanks Michael. Unfortunately I haven’t shot with enough different coated lenses to have an opinion.
Great post Alex 🙂
Alex as usual, you have given out some fantastic information. Also like to thank you for all the tips and help you have given me. Keep up the great work and those wonderful photos, they are brilliant.
Awesome stuff, very useful information. As always, love your work.
Thanks Jason!
Alex, you mention 80% of your shots are taken using the nd grad filters, are you stacking them on top of your B+W 110, i.e. using the 110 as a base for most shots?
Love your work!
Cheers
Thanks mate.
Only shots where the exposure is around 1 minute+ I’m using the B+W 110. But for those shots with the B+W, I am stacking the graduated neutral density filters over the B+W to hold back the exposure on the sky. You can get by without stacking the grads through bracketing an extra under exposed shot for the sky and doing some sneaky photoshopping 😉
Hope that helps a little!
– Alex
Great read. Although I prefer using the square filter system ND filters as they are much easier and less hassle using them. I posted a comparison review between the Lee ‘Big Stopper’ and the Hitech 10 stop ND filter here
http://blog.robertstrachan.com/archives/844/lee-big-stopper-hitech-10-stop-nd-filter-review/
Those are awesome images. I have a cannon digital rebel XS EOS. What would you suggest for a density filter for this camera? What I’ve been wanting to do is take a photo of traffic in midday light, low ISO, and as long a focal range as possible, and perhaps a 10 to 15 second exposure if not longer to really make the cars streak across the road without the image completely whiting out. With that I’d like to photograph a person on the sidewalk at a much shorter exposure so they are completely still (during a time when there is no traffic behind them), and overlay them over the first image so they are still, and the traffic is blurred, and have the light of both look normal. Could this work with a density filter?
Hi James.
I’m pretty sure I understand the kind of shot you’re going for and I think 10-15 seconds might be a little too long. I’d probably get a weaker ND filter as opposed to the 10 stop ND filter. This is because the 10 stop is too harsh and you are looking at 30-120 second exposures during the day. Something like a 3 stop will suit your needs well as that way you can shoot something around 1-2 seconds to capture the streaks in front of your subject.
It sounds a fun shot. Have you considered using a flash on your subject with rear curtain sync? That way if you fire a small 2-3 second exposure, the flash will fire and illuminate your subject at the end of the exposure instead of at the usual start of the exposure. I have seen people do similar shots by using an umbrella and attaching a flash to the umbrella on a wireless trigger. That way the photographer can stand on the other side of the road with the flash attached to the umbrella and bouncing the light back onto the subject.
Anyway, hope that helps and good luck! I’d be interested to see how they come out.
– Alex