Posted on 7 Comments

Photography Tips – Composition

Hi all,

A little while ago I was asked by Digital Photography Magazine to write up a small article on how photographers can improve their photography with some photography composition tips. It was a little challenging sitting down coming up with the tips as most of these composition tips are things you begin to naturally incorporate into your photography workflow without realising.

In the end I provided Digital Photography Magazine with 6 different styles of composition that I try to rely on upon arriving at a scene and feeling slightly unsure what I’ll be photographing. Keeping an eye out for reflections, leading lines, colour in the sky, simple compositions or even compositions that would benefit from being placed in the middle of a frame, gives me some variety in how I might photograph the scene on the day.  They’re not rocket science but are a common theme across all my photographs which have got me to where I am today.

Be sure to catch the tips in the next edition of Digital Photography Magazine.

Thanks,

– Alex

Continue reading Photography Tips – Composition

Posted on 4 Comments

Photoshop Tutorial – Manually Set Black and White Points

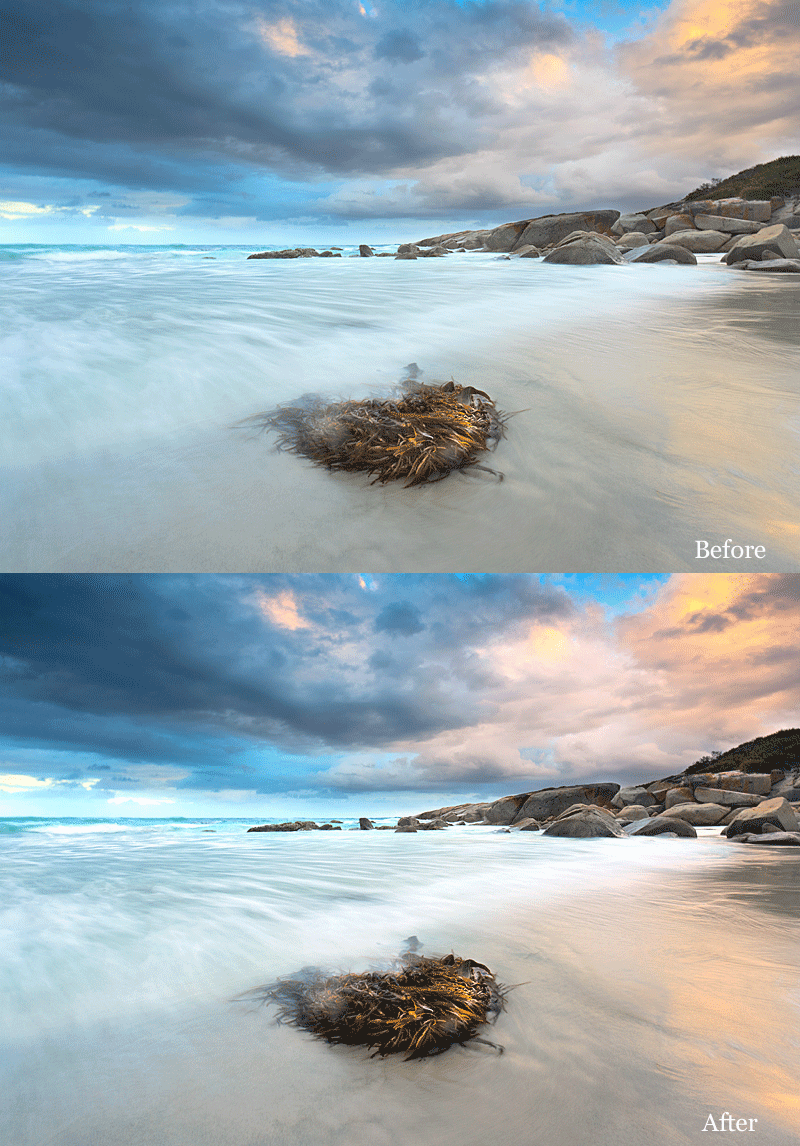
Recently one of my Photoshop tutorials I posted on YouTube was featured on PetaPixel. It’s a neat little tutorial that shows you how to manually find the black and white points of an image and then define them within curves. The effect can be quite interesting and I’ve found can reduce the colour cast effect that is brought on from using and stacking neutral density filters like the Cokin setup.  Admittedly it’s not something I use all the time but I find it useful for when I’m lacking motivation and curious to see what effect it will have on an image.

In case you’re feeling lazy and just curious how the effect looks on an image, scroll down to the bottom of the post where I’ve included two before and after gif clips.

Apologies that my blog theme isn’t the prettiest thing when it comes to posting tutorials but bare with me.

Continue reading Photoshop Tutorial – Manually Set Black and White Points

Posted on 13 Comments

SEO Tips for Photographers

I’m by no means an expert at Search Engine Optimisation (SEO) and if anything, still very much an amateur. But nevertheless I find SEO an interesting topic and have benefited from optimising my content over the years to develop a consistent stream and rise of traffic to my blog.

Continue reading SEO Tips for Photographers

Posted on 11 Comments

The Magic Cloth Technique – DIY Graduated Neutral Density Filter

I came across the magic cloth technique a few years ago when researching graduated neutral density filters but never actually got around to trying it. Recently a friend linked me to the stunning work that Tony Brackley-Prower had achieved by using this technique and was itching to try. The technique is a DIY neutral density filter that costs you nothing to try.

What are Neutral Density Filters?

Most photographers (myself included) use neutral density filters when shooting seascapes. These filters normally come in a rectangle size with black/dark at the top and clear at the bottom. Photographers use these filters when there is different levels of brightness in a scene. This is common when photographing seascapes on sunset where the sky can appear slightly brighter than the surrounding foreground. If photographed without filters this can result in the sky being over exposed as the camera attempts to compensate the darker foreground. We use neutral density filters to avoid this problem by placing the darker part of the filter at the top of the frame to capture a more even and natural exposure. Most neutral density filters are expensive with a Cokin set and a Lee kit . I was curious to how the magic cloth technique would compare to these more expensive neutral density filters.

Fast forward to December this year when I was visiting family and friends in my home town of Hobart, I gave the technique a try at Park Beach with some long exposures.
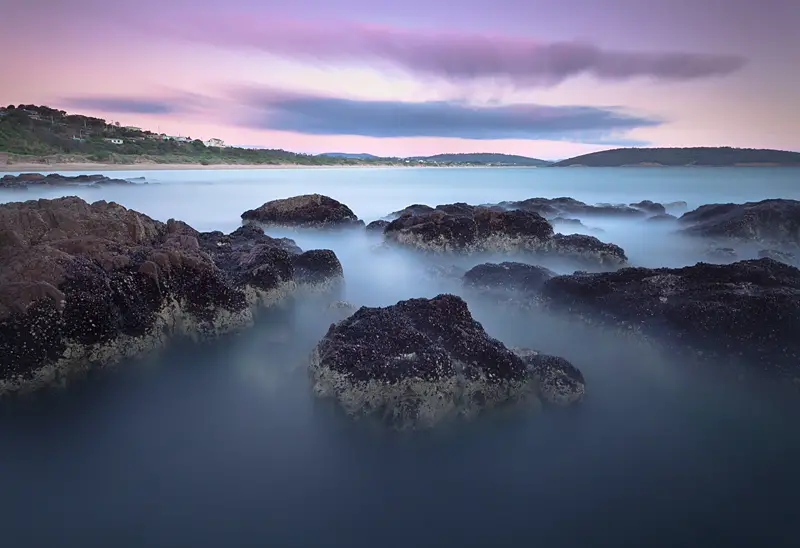
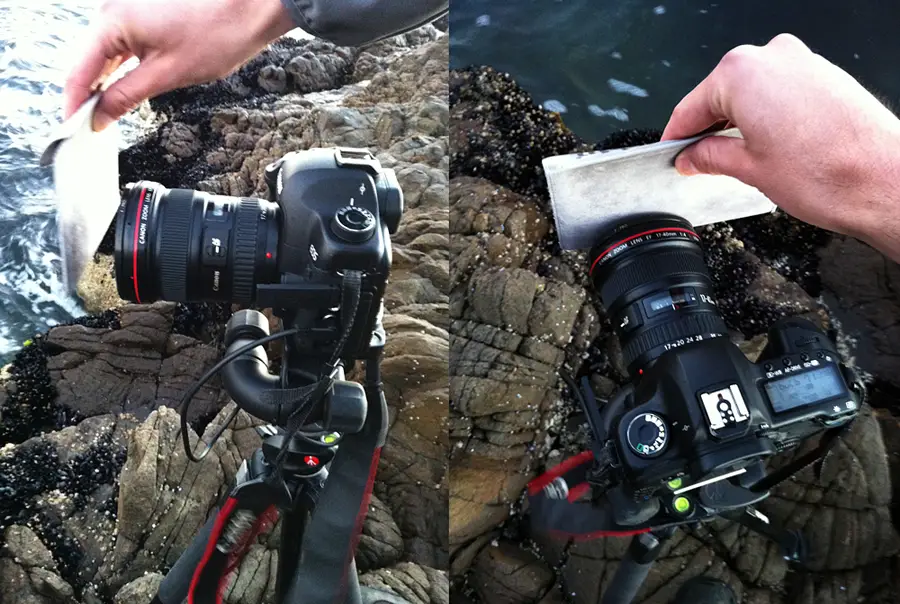
Magic Cloth Technique

The technique is appealing as it’s so simple and costs nothing. No surprises that the technique is based on using a cloth or even as Tony suggests, you can also use a sock, wallet, or cap. Really the possibilities are endless but the most important thing is finding an object which you can easily hold over the front over the camera to cover a certain part of the image. Once you’ve found a suitable object to use for the magic cloth technique, you’re now ready. The technique is best used for long exposures as this gives you greater control and flexibility over the image.

It is suggested to meter the image in your camera around 2 stops over exposed when using the technique to get the best possible exposure. Begin by starting the exposure and covering the lens with the object. Over time, gradually move the object up (towards the sky or the top of the frame). The slower you raise the cloth results in a darker grad. In simple terms this means your sky will receive less exposure and be considerably darker. If instead you raise the magic cloth faster, this will result in a less darker grad and brighter sky.

And really that’s all there is to the magic cloth technique. Experiment with the technique and you will slowly get a feel for how it works and how it might be beneficial for certain scenes. Now that I’ve tried the technique with seascapes I’d love to try with photographing waterfalls up close to avoid sea spray going all over my lens and to capture greater detail of the surrounding foliage areas.

You might also be interested in my waterfall photography guide. A thorough guide that covers waterfall photography, the ideal weather, equipment you’ll need, visual examples of how shutter speed works and other bits.

If you’re new to long exposures, my guide on daytime long exposures might also be of interest.

Hopefully this was helpful! 🙂
 

Posted on 7 Comments

Park Beach – Seascape Long Exposure (Includes Before/After)

Park Beach, Tasmania

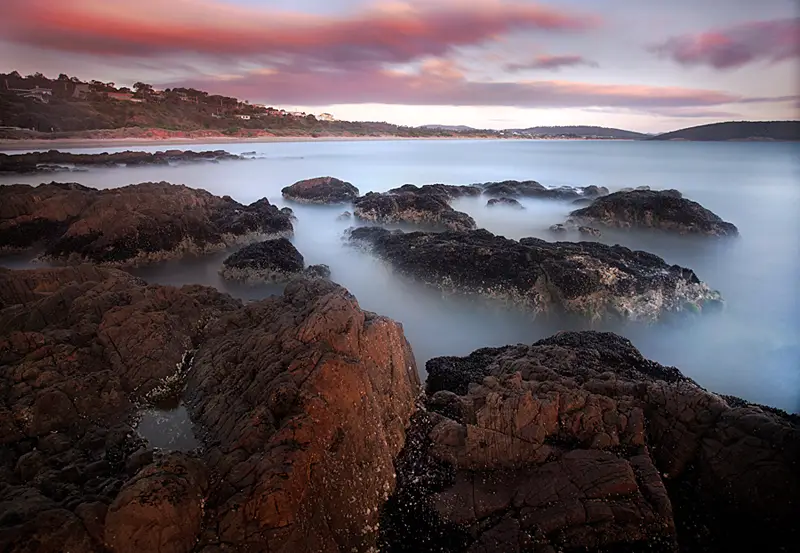
A photograph from my recent trip home to Tasmania for Christmas. This long exposure photograph was captured at Park Beach, Tasmania just after sunset. This is one of my favourite coastlines to photograph in the Hobart area even if it is quite limited on sunset. Unfortunately you’re limited to shooting in this direction if you wish to capture any colour in the sky, ignoring all the interesting rock formation that faces the opposite direction.

This is a 10 minute long exposure that was captured with a Canon 5D Mark II, Canon 17-40, B+W 110 and tripod.

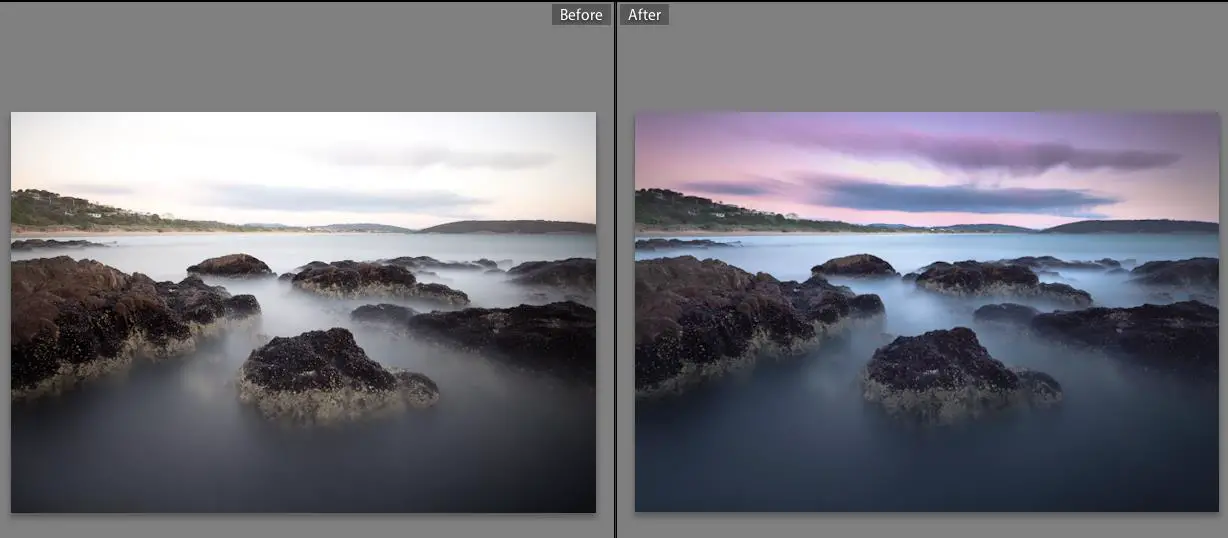
Before and After

And for something different, this is the before and after images from Lightroom. The image is around a stop over exposed which was both good and bad. The reason for it being good is that it brought out a lot of detail in the dark area of the rocks which can easily be lost in a regular exposure due to the area having strong shadows. But on the other hand, I also lost a lot of sky straight out of camera. Fortunately the Canon 5D Mark II retains a lot of detail and I was able to save the sky.

The edit was actually quick and probably only took around 2 minutes. In Lightroom I dropped the exposure considerably which brought back the sky but darkened the rocks. Rather than keep the rocks under exposed, I used the adjustment brush with a +1.00 exposure to bring the rocks back out.  After that I adjusted the temperature of the image (cooling it) and selectively adjusting the saturation points of parts of the image until happy. Finally sharpening the image in Photoshop with the unsharpen mask.

Update 10/06/2012 – I’ve since created a tutorial video on how I went about editing this photograph. Granted the final image doesn’t come out exactly the same as the image used in this post but it should give you a good idea of how the I went from the before shot above to the final image. The key things to note is the graduated filter and adjustment brush make all the difference and allow you to make the majority of your edits without needing to open up Photoshop. Be careful though. It’s easy to over do the editing when using these tools and I think the final image is starting to reach that.

Direct link to this Adobe Lightroom Tutorial Clip