Posted on

Before and After – Under the Stars

Sitting under the stars in Pimba, South Australia

In the last few years I’ve been in awe of the work by Michael Shainblum who is just one of the many people  upping the game when it comes to silky clean milky way and star photographs. I have to admit, milky way photography has never been one of my strongest points and I’ll often blame the age of my Canon 5D Mark II being limited in lowlight as an excuse to not get out and shoot milky ways. With a recent trip I was keen to challenge myself with this photograph titled Under the Stars which features me, sitting on a hammock attached to a tree wrapped in fairy lights under the milky way with a fully stoked fire keeping us warm. The end photo required a few shots at varying exposures to bring it all together which I’ll look to walk you through in this post.

Challenging your in camera and post processing techniques

On a drive from Melbourne to Perth (50 hours of driving) I was keen to explore some of the night skies in the middle of nowhere and add a couple of milky way shots to my gallery. Yes, the Canon 5D Mark II struggled at ISO 3200 but unless you’re looking close, it’s not too noticeable (well I think so anyway..!)

[box type=”info” style=”rounded”]My Melbourne to Perth roadtrip post has more photos from this trip where I explored some of the best parts of Australia[/box]

This is one of my favourite photos of the trip and is something that was just a concept I was keen to try. To be honest, I didn’t think I’d be able to pull it off in getting the right exposures and post processing it correctly but I’m pretty happy with the end result. 
The hammock wasn’t just for decoration and was the perfect way to kick back before the sunset

Coming up with a concept that’s outside your comfort zone and giving it a go is the only way to really push your development in hands on photography and post processing. There were other concepts that I toyed with while we were away and you know what? They didn’t come off. But it was fun taking them and giving them a try. Next time you’re planning a photography outing, why not set yourself a lofty goal and see how you go executing it? If you fail, you’ll learn so much on how to do it different next time. If you succeed, you’ll no doubt pick up on things you can do better next time while learning little techniques that you may not normally use in your normal post processing workflow.

[box type=”info” style=”rounded”]I recently bought a new travel tripod and compared the 5 most popular tripods on the market. Give my travel tripod guide a read if you’re looking for a lightweight tripod for your next trip![/box]

About the photograph
Unglamorous camp photo. I couldn’t resist and camped without my tent cover. Sleeping under the stars was something amazing

For this photograph, Under the Stars, we were camping in Pimba, South Australia which is basically in the middle of no where. As we were driving around the area looking for somewhere to set up our tents for the night, we found this secluded part located just off the salt lake and surrounded by this tree you see in the photo. Straight away we knew where we were camping for the night. It was perfect, silence that was almost eerie and skies that were darker than some of my brother’s music tastes in high school (really dark! Sorry Rich 😉 ) 

After shooting the sunset and then shooting the milky way down at the salt lake for a few more hours, we eventually headed back to our tents but were still keen to shoot for a while longer to make the most of the dark skies.

With a hammock already in the tree from some lazy beers in the sun earlier and the fire lit to warm up, we decided to pull the solar powered fairy lights out of the car which we had bought on the first day of our trip and neglected ever since. I knew they would eventually come in handy..!  

[box type=”info” style=”rounded”]Interested in landscape photography? My guide to landscape photography shows you how to get started in this fun part of photography[/box]

Taking the photograph
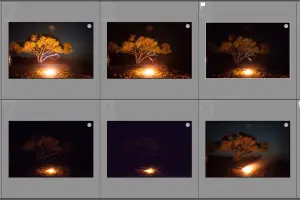
The final photo was a mix of 4 images with the other 6 very loosely used where required (i.e. detail in the tree or fire)

When experimenting with an image concept I have a habit of going overboard with my image brackets. Throw in the poor performance of the Canon 5D Mark II and you have 10 bracketed images. Ok ok. I probably could have got by with less but better safe than sorry right? 

There is some reasoning to my madness with the need for having 10 different images coming from:

  • Tree and fairy lights –With a light wind around this meant a shorter exposure of the tree and fairy lights was needed to avoid any shake. This had to be a high ISO shot to get a shorter exposure (5 sec)
  • Me sitting in the hammock – Trying to sit still in a hammock with no subtle movements should be an Olympic sport. Either that or I have ants in my pants. With this said, I needed a shorter exposure  (2.5 sec) of me sitting in the hammock to minimise the risk of any subtle movements
  • Exposing for the stars behind the tree – With the plan to make this a two image panoramic (one for the scene you see in most of the frame and another for the milky way sky) it was important to bracket a shot of the stars behind the tree which would allow for a seamless alignment of the two images
  • Positioning the camera further up to capture the milky way – I won’t lie the milky way wasn’t directly above the tree like the photo suggests but it was close! Unfortunately it was hovering just to the right of the tree however by angling the camera up I was able to capture a frame which would later be used above three
  • Short burst for the fire – The plan was to capture the fire looking more natural rather than a blur of orange light. Even at ISO 25600 I wasn’t able to get an exposure short enough to get the fire how I wanted it. At ISO 25600, the Canon 5D Mark II really comes into its own with its amazing handling of noise (sarcasm intended). 
  • Couple of extra frames for good measure – I’ve got nothing. Press the button and hope for the best for a few frames?

Bringing it all together

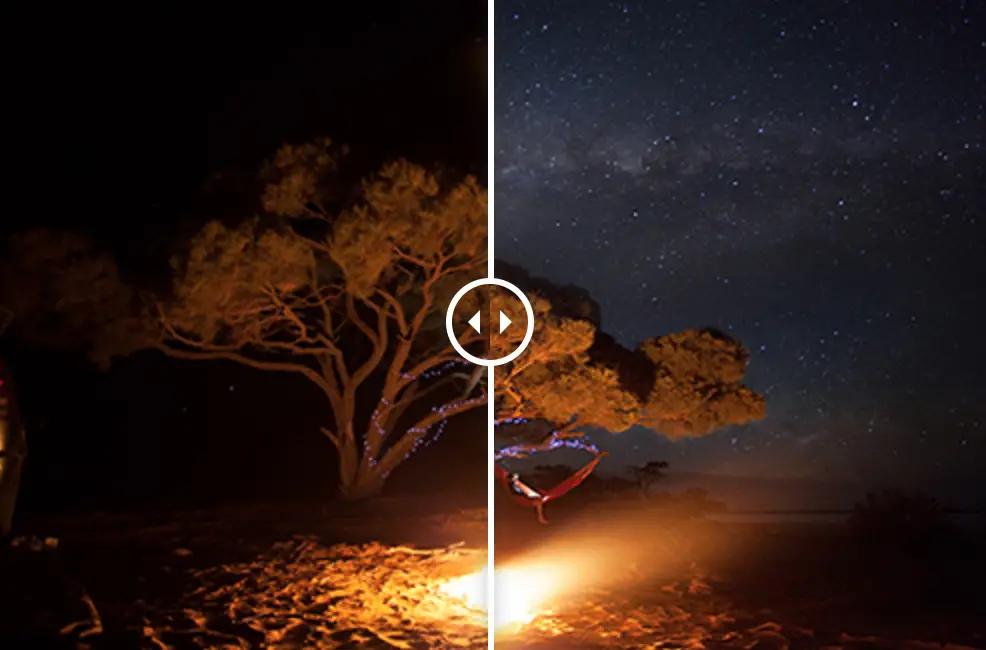
[twentytwenty]

[/twentytwenty]
I’d love to tell you that I processed this with the same level of precision like Marc Adamus in the space of 10 minutes. But in reality of me being sleep deprived after driving 12 hours the day before and not really knowing what I was doing, the edit for this photo took a couple of hours or so of extreme procrastination and trial and error. 

The key elements to processing this image (after we get past the trial and error):

  • Bringing all the concepts together with layer masks – As mentioned earlier in the post, I shot a series of frames at different ISO levels and shutter speeds to minimise noise where possible and capture specific detail (i.e. me in the hammock or the detail of the fairy lights).
  • Cloning out the car – Not sure when composing that I didn’t notice a small part of the car in the frame. Whoops. A quick touch over with the clone stamp tool had it removed.
  • Colour grading – Sorry, that sounds wanky but it also sounds like I know what I’m talking about so let’s run with it. Colour grading was selectively applied to the image using layer masks. The intent here is to control the colour to parts of the scene which may have been affected by noise. Parts of the image where these minor tweaks were applied include adjusting the blue hues in the sky and dialling back the orange glow on the sand.
  • Overlaying the milky way – Dropping the milky way into the shot was either going to make or break the photo. In an effort to make it look as natural as possible, I used the bracketed image with the stars as the base image of the sky. I then used the image which had the milky way with a very subtle transition through the tree using an inverse selection. 
  • Noise reduction – Shooting at ISO 3200 and higher does leave you with some ugly noise in parts (i.e. around the dark parts of the sand where I’ve tried to pull back some detail). Fortunately Nik Collection’s free Dfine tool works wonders for the removal of noise. I don’t apply noise reduction across my whole image and prefer to just apply it selectively to parts of the image most affected. When you are applying noise reduction, you are reducing the sharpness of the image so it’s important to ensure you are only applying it where needed to minimise any loss of sharpness. 
  • Dodging of the scene – As I was using exposures of various dynamic ranges, there wasn’t much needed in the way of dodge and burning of the scene. With only some minor dodging applied to the fairy lights to make them appear brighter and further dodging around the fire to create the flare effect you see in the final image.

To help give you a sense of how the different adjustments were made and effected the image, I’ve put together this short clip which gradually introduces the various layers to reach the final image.

[box type=”info” style=”rounded”]If you enjoyed this post, be sure to give my Before and After series a look for similar posts[/box]

Feel free to use the contact page if you have any comments or questions about this post.

Thanks for reading!

Alex

Posted on 2 Comments

Finding the Sunset Direction for Photography

The Photographer’s Ephemeris is a fantastic tool that makes planning photographic expeditions a total cinch. No more wasted trips or missed shots due to unsatisfactory lighting or the pesky sun popping up over the horizon in the ‘wrong’ place. I rely on it quite a bit as part of my photography workflow and wanted to share a bit about the app, why its a useful tool to have and how to use it. 

What is the photographer’s ephemeris?

The ephemeris? It’s connected to the thigh bone, surely?

Actually, no. An ephemeris is a chart or collection of data used to help locate the position of “celestial objects”. As far as photographers are concerned, this means the sun (or moon, if you’re of a long-exposing, nocturnal persuasion). In practice then, what The Ephemeris does is let you figure out where the sun or moon will be, at any given hour, on any given date. Don’t worry, it’s quite the mouthful that has stumped many photographers as it’s popped up into conversation with us all having a stab on the pronunciation. Just for the record, I go with ‘ef-eh-meris’ myself! 

While the name and description might make it sound more like an obscure, archaic document that’s spent the last 300 years locked in a dusty university library somewhere, The Photographer’s Ephemeris actually comes in the form of both smartphone app and web-based desktop program. It takes complex astronomical data and visually displays this by means of Google Maps, making it easy to use – even for us halfwit camera-monkey like me. Here I walk you through how and why you should use it, so you don’t need to go bothering the professor for an explanation.

Who needs it?

You, more than likely. Or, at least, any photographer who cares about quality of light. Given that the word photography literally means ‘writing with light’, that’s pretty much any photographer who wants to take good pictures. That is you, right?

The Photographer’s Ephemeris is the perfect tool for capturing that last burst of light and knowing just the right spot to stand

Obviously this will be especially of use to landscape photographers. For example, a successful portrait primarily depends upon the distinctive countenance and charisma of the person portrayed, and the photographer’s ability to create a rapport with that person; meanwhile street photographers are flaneurs, lurking in the urban environment waiting for humanity to collide in quirky and ephemeral juxtapositions that are in some way revealing of our society and its values. These are one-off, fleeting moments that are difficult – if not impossible – to recreate.

As a landscape photographer, however, your subject matter may be considerably less unique.

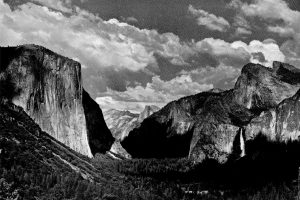
CreditAnsel Adams

Indeed some of the most successful and well-known landscape photographs are of locations that have been captured time and time again – both by unimpeachable masters and a hundred-thousand cack-handed amateurs alike. What makes Ansel Adams’ vision of Yosemite still stand out today is his mastery of composition and light. The Photographer’s Ephemeris is a tool to help you achieve just such mastery.

In fact, perhaps we should rephrase things: if you’re a landscape photographer then your subject is light. The landscape is just a receptacle for your subject. And if light is your subject then you need to be in control of it.

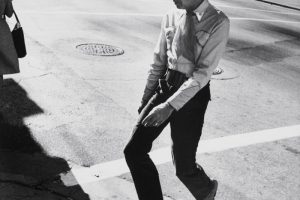
Credit: Garry Winogrand: Dallas, 1964

With that said, some of the greatest portraits, street shots and other iconic photographs also draw a significant part of their appeal from the succesful use of light: just think of those classic Garry Winogrand images of the aging Texan cowboy stepping onto the sidewalk, or 3 women at the corner of Vine St. They just wouldn’t have the same impact if it wasn’t for the driving beams of sunshine illuminating the concrete canyons of the North American metropolis and throwing the subjects into relief. In fact, we might well ask whether either of these photographs would have made it any further than Winogrand’s contact sheets if instead he’d rolled up 40 minutes later –  shooting the same scene but in total shadow, rather than dramatically backlit as he did.

Given Winogrand’s famously haphazard and frenzied manner of shooting, however, I think we can safely assume that at no point did he ever bother to consult a sun-chart. Nonetheless, this doesn’t mean that you shouldn’t. Certainly there’s little point in descending upon a potentially rewarding street corner only to discover that the last ray of sunlight disappeared over the rooftops a good half an hour earlier just because that’s what Winogrand might’ve done (he also died leaving behind thousands of undeveloped rolls of film he shot of random women out of his car window, you want to try that too?).

Why should you use the photographer’s ephemeris 

Needless to say, for anyone hoping to capture light at exactly the height and angle they want it, the ability to pick the right time and day to be in a certain location offers an enormous advantage. Instead of repeatedly having to drag yourself out of bed at obscene hours of the morning in the vain hope of encountering that perfect sunrise, you choose your location, check for the auspicious alignment of “celestial bodies”, and set your alarm. Job done.

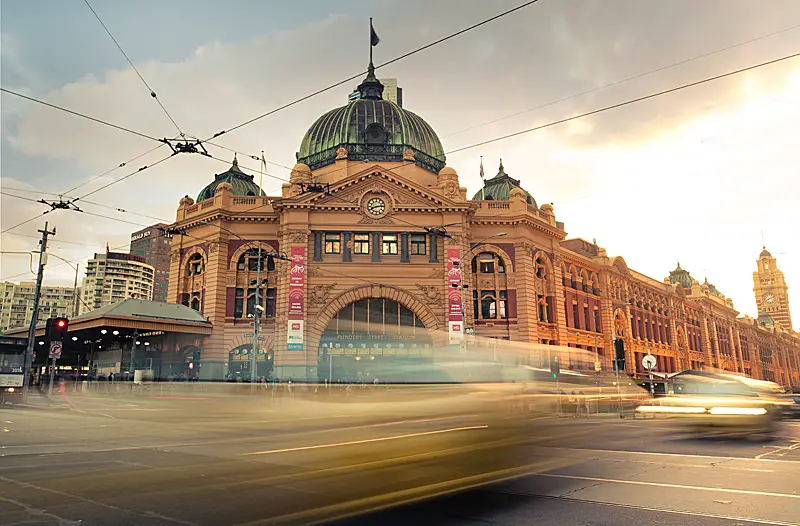
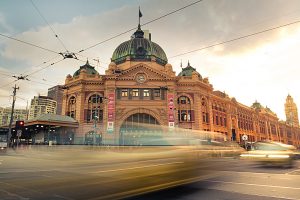
Catching the golden hour light up Flinders Street which only lasts a few minutes before disappearing between the buildings

And your somewhat less-than-celestial body likely gained an extra half-hour under the bedcovers. I’ve used it for a few photo shoots including one of the light shining up Flinders Street just before it dips beneath the buildings. Knowing the timing of when the light would be at the right level before it dipped was crucial to getting Flinders Street Station lighting up with that golden hour light that we all love.

Alternatively, you can just keep doing it the way you’ve always done: standing in the middle of nowhere for 60 minutes of subzero twilight waiting for the sun to finally drag itself over a mountaintop, only for the light to totally miss the subject of your photograph when his celestial highness finally does rise anyway because you came way too early in the year.

What the photographer’s ephemeris helps you with

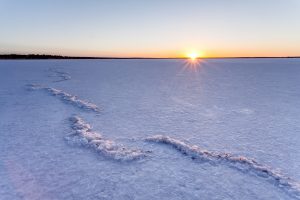
When shooting on a salt flat with not much in the way of composition, it’s great to know where the sun is going to set and burst

You’ve found the ultimate location, scouted the perfect vantage point, pre-visualised the composition and selected the right lens. All you need now is the weather and the light. Unless you’re that omnipotent dude with the beard and staff, or happen to be with the CIA, then there’s likely not a great deal you can do to control the former. The light, on the other hand, is largely just a matter of careful planning.

Planning your best sunrise and sunset locations

Got a location in mind for a stunning sunrise or sunset shot but want to check that it really is pointing in the direction you think it is? The Photographer’s Ephemeris will save you from a wasted trip. A great feature of the photographer’s ephemeris is that it also allows you to simulate different dates and times which works well for locations where the sun may be rising or setting at a different angle depending on the earth’s axis.

Chasing that keylight and backlight

When it comes to photography there’s really no right or wrong type of lighting, rather there will just be some qualities of light that are more or less appropriate for the particular shot that you’re trying to achieve.

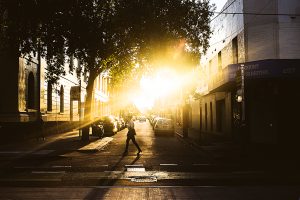
Waiting for that burst of light up Greville St, Melbourne. Rather than wait all day, I just plugged the location into The Photographers Ephemeris iPhone app and knew what time to arrive

Many, if not all, serious photographers often have a preconceived idea of what they want an image to look like long before they get anywhere near to shooting it. This will frequently include plans regarding lighting. Clearly, if you’re this meticulous about the light in your photographs, and have a set idea in mind, you absolutely do not want to spend time and energy trekking off into some remote wilderness only to discover that nobody called the sun to inform it of your plans ahead of time. For this reason, The Ephemeris can be indispensable.

Indirect light

While missing the light can be a real disappointment, finding a scene speckled with stray sunbeams when you were hoping for a flat, contrast-free location in which to shoot can prove equally frustrating. Indeed, predicting precisely where the sun will hit is one thing, but sometimes you may want to avoid direct sun shining on the subject altogether – but still with a beautiful glow of soft yet directional light reflecting in from the sky.

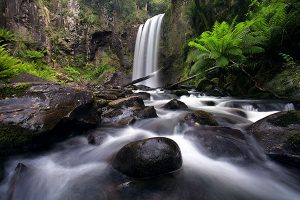
Getting a soft light is key for waterfall photography

Just waiting for dusk to fall will not produce the same effect, so you’ll need to identify a point at which your location will succumb to the shadows caused by obstructions such as mountains or buildings, yet before the sun goes down. Indeed, The Ephemeris is probably just as valuable for its ability to show which areas of a locality will be without light as it is for indicating those with.

[box type=”info” size=”large” style=”rounded”]Knowing when the light will be dim works wonders for waterfall photography. My guide on waterfall photography goes hand in hand with this guide to capturing the best light[/box]

Using the photographers ephemeris

I know what some of you are thinking: “What do I need this for when I have a compass on my phone and Google Maps clearly shows where north is? The sun rises in the east and sets in the west. Easy!”

Sure, assuming you only need to gain a rough sense of where the sun will be positioned, your compass or map will do the job just fine. But there are many situations where the success of a shot will depend upon the light hitting a precise feature within the landscape, and at a particular angle. Without even getting into complex shots of incredible natural phenomena, lets just look at a very banal, easy to understand example: someone standing at a window with a nice backlight.

[box type=”info” style=”rounded”]Interested in landscape photography? My complete guide to landscape photography equipment and technique has you covered![/box]

Let’s pretend for a moment it’s April where ever you are in the world when you first spot the location. Inside, the room is exactly what you were looking for. Outside, the view is even better than you’d dreamed of. It’s perfect in every way.

Or at least it would be if it wasn’t for the fact that the building opposite blocks all sunlight from entering the room and illuminating your model, and there’s no sign that this situation will change later in the day.

Getting the right timing as the light pokes through the buildings of Sydney

Checking on the The Photographer’s Ephemeris, however, you can see that it would be worth coming back to shoot in late May, as by then the sun’s path will be sufficiently high to clear the building opposite and beam down through the window for over an hour each morning, allowing you to get the photo you wanted. Conversely, you can see that if you leave it until June before returning to shoot, the sun will already be too high in the sky and only briefly enter a few inches into the room before passing directly overhead.

Now imagine that you’ve seen some spectacular limestone rock formations, with holes in, allowing a view across the plains to a mountain peak. You have the idea to line up the sun, the peak and the holes. But is it possible? The Ephemeris knows.

How Does It Work?

Save and sync your locations between the desktop and mobile apps of The Photographer’s Ephemeris

Begin by choosing a style of map suitable for your subject (i.e. either regular Map, Satellite/Hybrid or Terrain). Now search for a destination you’re interested in shooting and drop a red pin right on your location. This screen gives you the ability to simulate where the sun will be at a given time, objects that may get in the way (i.e. a large rock stack) or even show you the shadow length that an object like a large rock stack may create.

The Photographer’s Ephemeris is a powerful tool and I must profess that I’m only covering off the very basics in this post. The tool is capable of a lot more including a night mode which allows you to track the milky way and integrates with Skyfire which gives you sunrise and sunset forecasts to help you in finding the best location to photograph the sunrise or sunset. How good is that?! Rather than complicate this post, I’m going to cover off the basics with the next few points.

Bookmarking your favourite locations

Locations can be bookmarked, so you can come back to them later: for example, as you’re sitting down for lunch planning your shoot for the afternoon you can quickly recall your saved location and check for the ideal date and time to shoot. If it’s not looking the right light, just keep scrolling through your list until you find somewhere that will be ideal based on the conditions of the day.

Simulating the sun at different times of the year

Finding the right light at Cape Schanck, Victoria
Finding the right light angle at Cape Schanck, Victoria
Golden hour light hitting Cape Schanck

Choose a date from the calendar and then scroll across the timeline in order to see the trajectory and angle of light on your location at any particular moment during the day (or indeed night). This feature works well for photographing locations like my photo from Cape Schanck to the right. It was important to get the golden hour light shining on the rocks at the right angle. If I were to have photographed this at other times of the year, I would have had a harsh shadow of myself appearing in the frame. No one wants to see my ugly shadow in the frame 😉

Planning for obstructions that may block your light

Dropping a second, gray, pin displays geodetic data (i.e. info about the shape of the land, elevation etc.). This feature is extremely handy, as it allows you to work out if, say, a mountain or other geographical feature might potentially block the sun from illuminating your location for a further period of time after the sun has already risen and is shining everywhere else.

Once again, if you enjoy shooting in diffused light, The Ephemeris will allow you to plot the ideal time to start or finish work at a shortlisted location, before unwanted rays of strong direct sunlight start creeping into the shot. Move the timeline to see where shadows will fall, and from which angle, at any given time of day.

Simulating what effect the shadows may have on a scene is easy with The Photographer’s Ephemeris

Given the relative difficulty of estimating for yourself just how quickly shadows will grow or begin to disappear, perhaps the most important feature here is the app’s ability to display how long or short shadows will be at any particular moment. For example, if you’re a shooter that is looking to use the shadows to your advantage with a scene then having this feature can be a great one to have. Occasionally I will use it for my photography to help understand when the light will even out and give a flat exposure to my camera.

[box type=”info” size=”large” style=”rounded”]Interested in getting into long exposure photography but stuck for ideas? Give my long exposure photography ideas post a read![/box]

Closing out

The Photographer’s Ephemeris is a great time-saving tool for photographers across the board. While it will be particularly useful for those who shoot landscapes, it can also come in handy for photographers working in many other areas too.

While not a critical tool that every photographer must use, it is definitely one which photographers should know about and have up their sleeve. I’ve found it particularly useful when planning to photograph a location I’ve not visited before and looking to ensure I make the most of my time there. A great example of this was from a recent trip driving from Melbourne to Perth where we were visiting locations for the first time and was looking to ensure we were maximising our sunrise and sunset locations.

Indeed, for anyone planning a complex shot that relies upon precise natural lighting conditions, The Ephemeris will likely prove indispensable. By dropping a pin at your intended location you can quickly establish whether it offers the kind of light you’re looking for when you need it. If not, it’ll either be a case of choosing another date and time, or opting for a different location entirely. Either way, with The Photographer’s Ephemeris you can be sure that there will be no nasty last-minute surprises when planning a shot.

If nothing else, unless you’re a chronic insomniac, an amphetamine addict or a parent of small children (in which case sleep is anyway but a distant memory), you will likely appreciate the ability to set your alarm at a more convenient hour when shooting at sunrise.

Hope this guide has been useful! If you have any queries, please don’t hesitate to reach out and drop a line. Always happy to help!

Visit The Photographer’s Ephemeris to download the desktop or mobile app and learn more.

Posted on 3 Comments

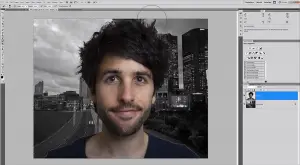
How to Create a Double Exposure in Photoshop

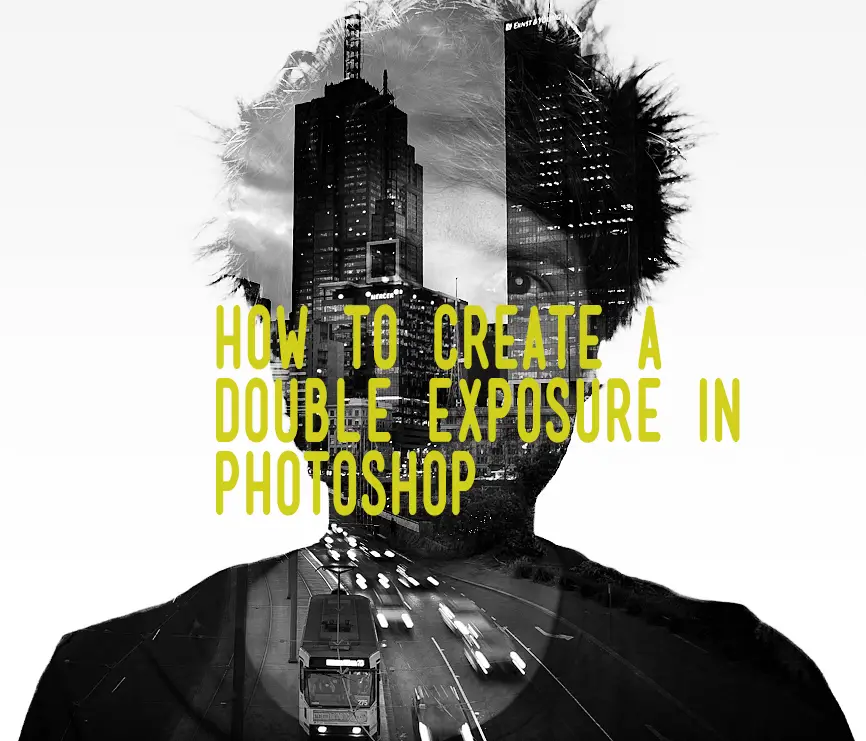
how to create a double exposure in photoshop


Creating a Double Exposure in Adobe Photoshop

A few years ago now I put together a video tutorial on YouTube on how to create a double exposure in Photoshop. At the time a few photographers were taking beautiful double exposures, achieving a similar effect to that seen in film and were doing it in camera on digital bodies. Most of these people were using the Canon 5D Mark III or other bodies which come with the ability to create double exposures in camera.

double exposure in photoshop
Blending these two images to create a double exposure effect in Photoshop

As I own the Canon 5D Mark II and the multiple exposure feature isn’t included, I was slightly disappointed and wanted to try achieve a similar effect in Photoshop. In the end I came up with a method of achieving the result. I must admit, it is messy and probably not the best way to achieve the end result. As some comments in the video indicate, there are better ways of doing it oh and apparently Phlearn is 10x better for tutorials. Harsh but true. Aaron Nace is amazing and I do recommend you look up his Photoshop and photography tutorials. They’re mind blowing and he’s really leading the field when it comes to tutorials in this area. YouTube comments are pretty amusing for the most part though. It really brings the best and worst out in people.

I’ve been meaning to put up a post on my blog about the tutorial and also link to the content I used for the tutorial in case anyone wants to have a play themselves with my ugly mug and a picture of Melbourne, Australia. It only took me 2 years… Sorry! Never too late right?

Resources for the Tutorial

For this tutorial I will be using two images which I’ve uploaded for you so you can follow the tutorial video with the exact images.
Download the city backdrop image used for the background (1.99 MB)
Download the self portrait image used for the foreground image (1.91 MB)

I’m going to let the video (and my poor audio) do the talking for a moment as I demonstrate how I blend the two images together. I’d suggest watching the tutorial first then attempt it yourself. For this tutorial, I was using Photoshop CS5 however you should have no issues doing it in previous or current versions.

As you can see in the video it’s actually really easy hey? The only frustrating part I find is feathering around the image to remove the background. As a commenter on the video said, it really is like playing minesweeper and can be a game of luck but you can make life easier for yourself by decreasing the tolerance and checking the contiguous box as others later mentioned. I do have some good news though, it is a frustrating tool the first time you play with it and does become more natural and easier to use over time.

Hope this tutorial was of use and if you have any questions be sure to get in touch as I’m always happy to help 🙂

– Alex

While your here you might also be interested in…

Posted on

Steel Wool Beneath the Stars – Post Processing Tutorial

Transparency in photography is something I’m big on. Some photographers like to keep their techniques and tricks to themselves while others are a little more open and happy to discuss.  I fall into the later group and am big on sharing with others. For me, sharing technique makes a good way of starting the conversation about how I personally do something which then allows for others to chime in with their opinion on how they approach it or do it slightly differently. Plus I can’t help but feel that being secretive wins you no friends in a digital world where it’s important to make connections with others.

Recently I was out shooting at Phillip Island with some fellow photographers (Ricardo Da CunhaTony Middleton and Michael Bates) playing around with some steel wool. It was only a few weeks back that I first experimented with steel wool photography when I put together this small guide on how to get started with steel wool photography. Eager to experiment I got in touch with Ric with the idea for a shoot and with Tony living in the area, both himself and Michael decided to join us.

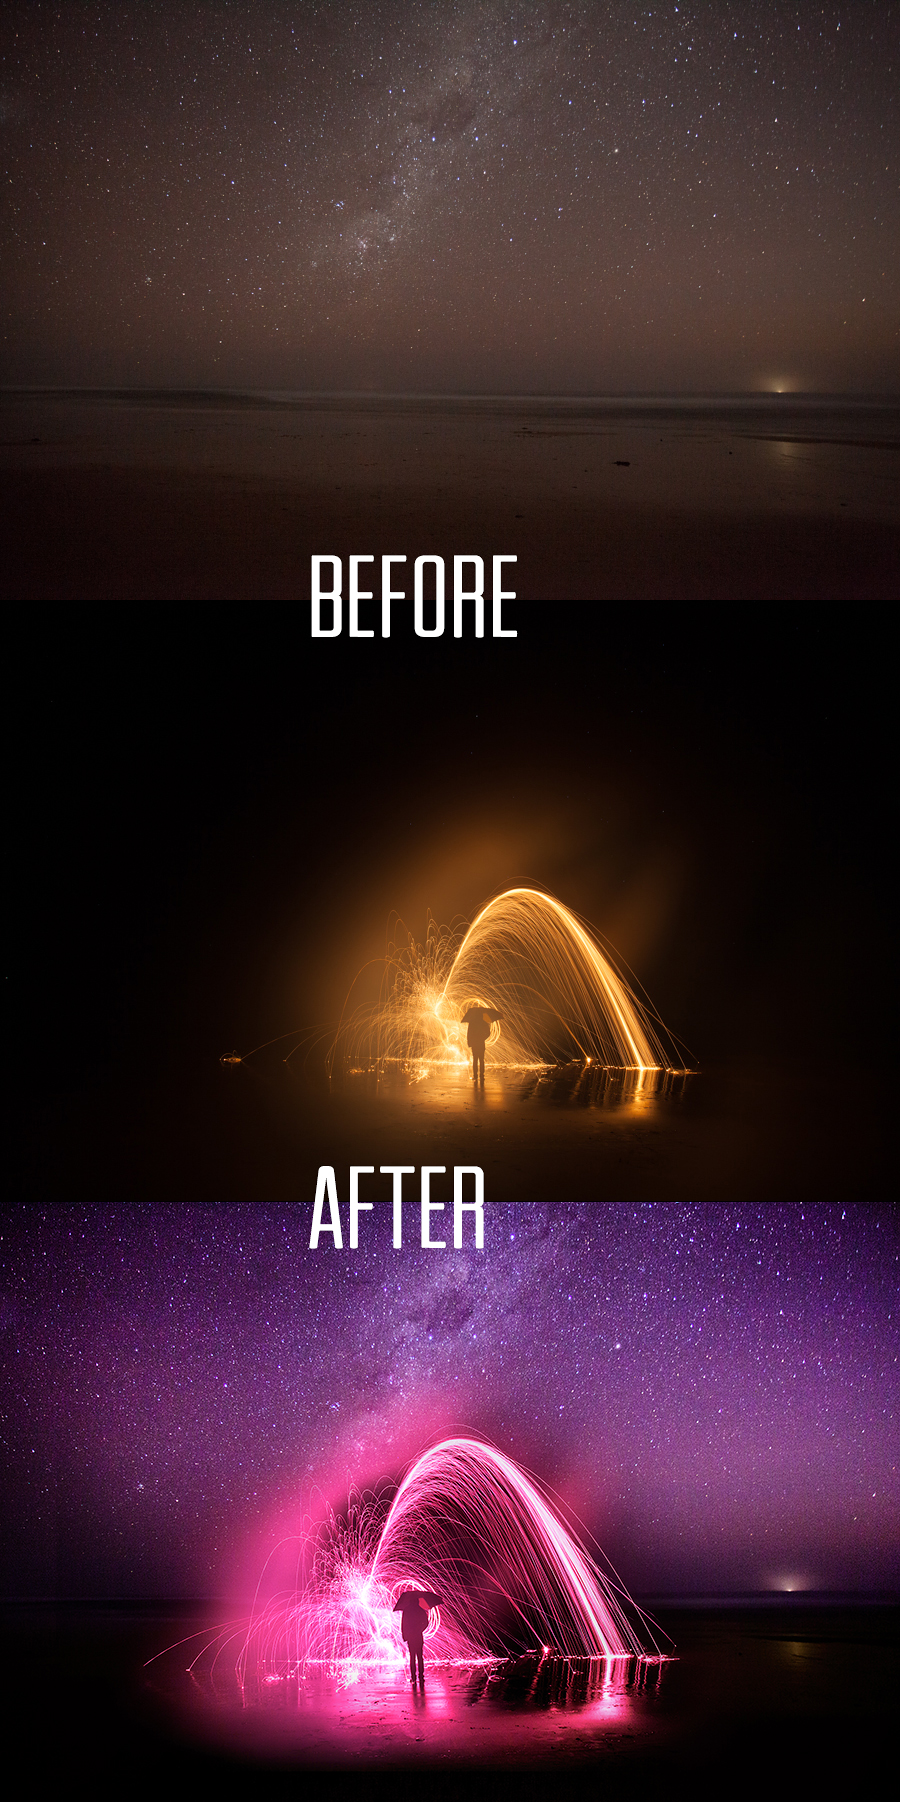
On the particular night it was a beautiful clear evening providing a great view of the stars. I was hoping to combine the two with the stars filling the top half of the frame and a steel wool long exposure at the bottom. Unfortunately after much effort it just wasn’t happening. One would over or under expose the other. It was a nightmare. Instead I opted to bracket two frames. Something I don’t normally do as my Photoshop skills could be best described as awful. So I took a frame of the stars and then another of the steel wool. Ric stood underneath an umbrella while Michael waved steel wool from above. It worked out great even if it did burn a few holes in his jumper… Oops.

So to get started let’s look at the two before images which are captured straight out of camera and then the final image which shows both images combined. It may not be to everyone’s tastes but at the time of shooting was how I envisaged the final image to look.

IMG_8339 - Copy

Editing Process

I’ve re-created the processing used for the image in a video below. Feel free to watch as it shows the edits I made in Lightroom and then the edits made to combine the two images in Photoshop. But for those unable to watch the video I’ll do my best to explain the steps taken to get the final image below.

Lightroom

Where possible I try to make 99% of my edits within Lightroom leaving only minor edits that I’m unable to make in Lightroom for Photoshop. The editing process within Lightroom included the following edits:

  • Both images had the tint heavily increased towards the pink end of the spectrum
  • Purple split toning was applied to the highlights of the steel wool image
  • Tighter crop of the steel wool was used due to there being too much wasted space which wasn’t needed for the blend
  • Hue adjustments made to the colours of the stars to bring out some feint blue
  • Curves adjustments made to both images (increase in lights & highlights with a decrease in shadows)
  • Hue saturation adjustments to the steel wool to tinker with the colour of the pink slightly
  • Adjustment brush used to under expose the land area of the star photo. This was mostly due to this part of the image being quite grainy and I thought by making it darker would allow for it to blend easier
  • Another adjustment brush was used for the steel wool photo to slightly bring down the highlights on the steel wool
  • Both images were exported

Photoshop

Both images were loaded into Photoshop with the steel wool exposure being overlaid to the star photograph. At this stage I positioned the photo in an ideal place and began to use the free transform tool to play around with the size and positioning of the photo. I aimed to have the person situated a little below the horizon.

Once the image was placed at a good level I created a layer mask on the steel wool image to subtly combine the image with the star image.  After this there wasn’t much adjustments needed other than dodge/burning around certain areas, pro contrast from Nik Soft applied and USM sharpening used to sharpen the final image.

For more information and to watch the process live see the video below for more information –

I hope this little Photoshop and Lightroom tutorial was of use for you. Apologies that the video is a little rushed but feel free to drop a line if you have any feedback or have any questions about the techniques used in the clip.

Thanks,

– Alex

Posted on 18 Comments

Create Yourself a Neutral Density Filter for Under $10


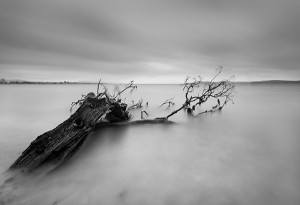
Example of day time long exposure
The effect of what a strong neutral density filter like welding glass can achieve. Note the streaky clouds and blurred water

[box type=”info” size=”large”]Neutral density filters are a great way to completely transform a scene. Using welding glass you can achieve the same effect for under $10[/box]

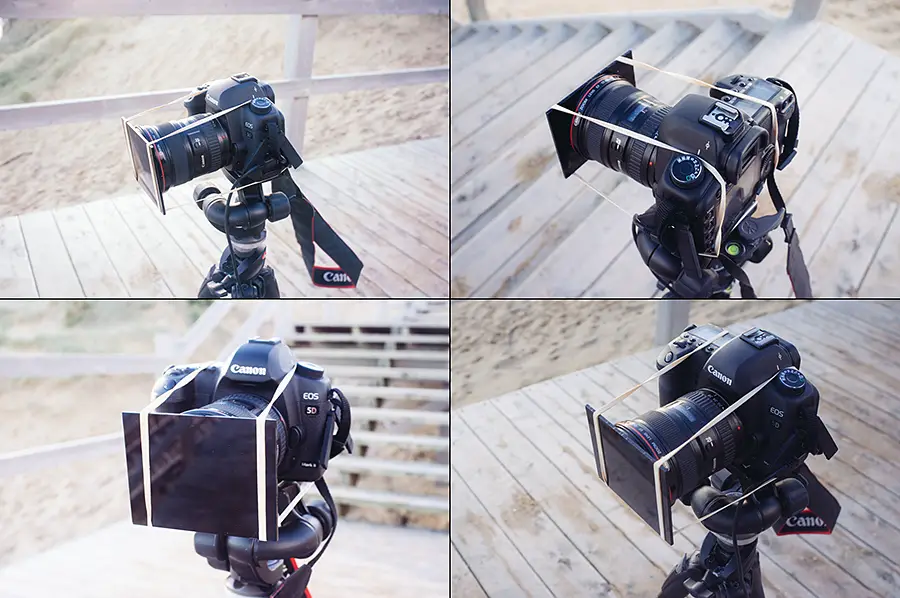
Creating your own neutral density filter using welding glass

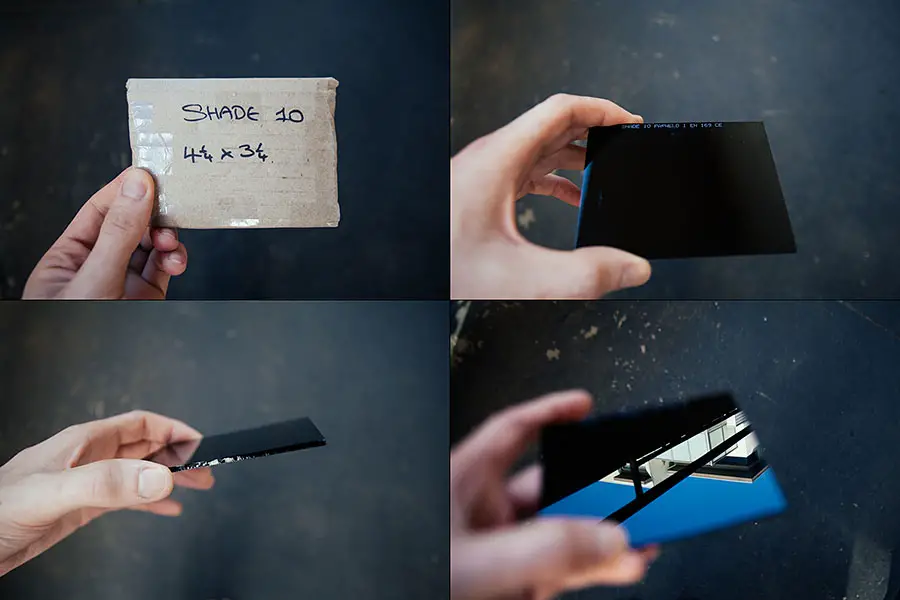
Ever since getting in to daytime long exposure photography I’ve read about people experimenting with making their own dark neutral density filters similar to that of the B+W 110 or Hoya ND400. These filters are great for day time long exposure as the filter is incredibly dark due to blocking out 10 stops of light. Rather than cough up $100 or so for one of these filters, there’s been quite a bit of experimentation with using welding glass to provide a similar effect of blocking out light so you can shoot day time long exposures for under $10. As someone who owns the B+W 110 filter I’d never had much need to experiment with using welding glass as an ND filter but recently I decided to pick up a 4¼ x 3¼ 10 shade piece of welding glass to see for myself how making your own neutral density filter really compares to the proper thing.  Would there be a colour cast? How would I mount the thing to the camera lens? Would there be a reflection from mounting it to the camera lens? These were the many questions I had and I’ll use this post to highlight the good and bad aspects of going the DIY route for strong neutral density filters.

Welding Glass Neutral Density Filter
4¼ x 3¼ 10 shade piece of welding glass. Did I mention how reflective the welding glass is?

Continue reading Create Yourself a Neutral Density Filter for Under $10