Posted on 7 Comments

Long Exposure Filters Buying Guide

Neutral density filters are a great way to get creative and explore long exposure photography. With most manipulation to a photograph happening during post processing, it’s a refreshing change being able to get creative in camera with the various effects of long exposure photography.  The purpose of this article is to give you an overview of long exposure filters, how they work and what’s best based on your budget. 

Personally I recommend the NiSi long exposure kit paired with the NiSi’s circular polariser for anyone looking for the perfect long exposure filter kit. Whilst a bit on the pricey side, you are getting high quality filters that won’t affect your image quality which can be an issue with colour cast issues which comes with other brands like Cokin or Hitech. 

What is Long Exposure Photography?
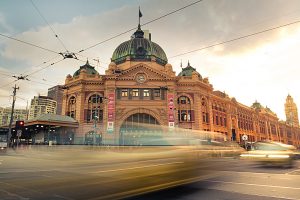
An example of where a neutral density filter was used to slow down a moving object while keeping surrounding objects sharp

Before we start talking about the pros and cons of different neutral density filters, let’s get back to the basics for a moment. Long exposure photography or slow shutter photography, is where your camera uses a slower shutter speed to blur moving objects in your shot while keeping other parts of your image sharp and in focus.

Let’s look at this with a real world example of a long exposure image from Flinders Street Station. By using a slower shutter speed, I’ve been able to blur the passing traffic while the rest of the frame is sharp and in focus. This is just one of  the various styles of long exposures you can capture. My long exposure photography ideas has many more styles for you to explore from waterfalls to dark starry night skies, long exposures can be used at any time during the day with or without filters. 

What is a Neutral Density Filter?

Circular or Rectangle? 
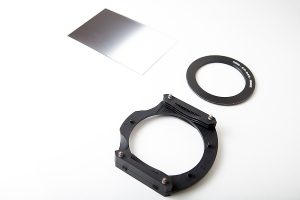
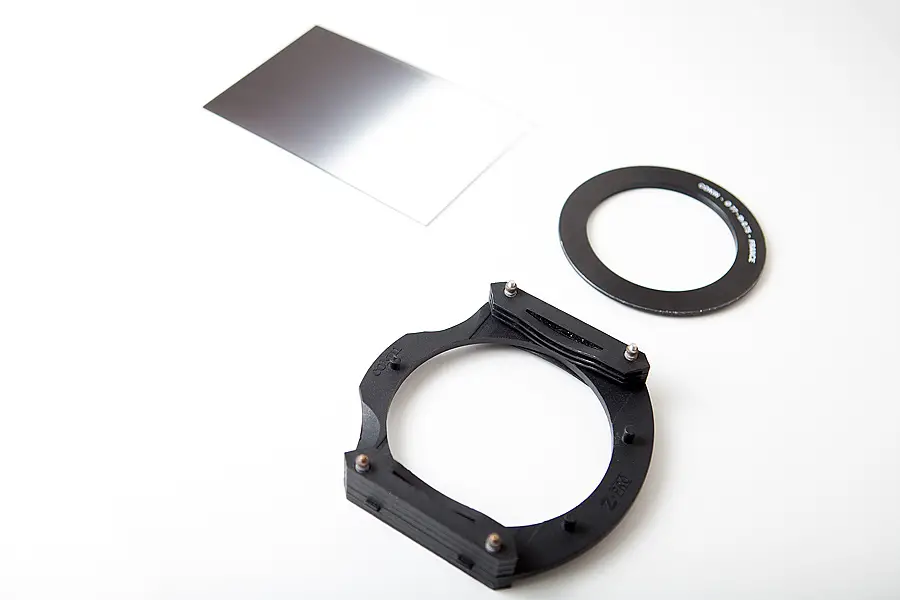
Example of a rectangle neutral density filter setup

If you asked me this question 2-3 years ago when the Lee Big Stopper and NiSi rectangular circular polariser didn’t exist, I would have suggested stacking a mix of both circular 10 stop neutral density filter like the B+W 110 10 stopper and a rectangle graduated neutral density filter like the Cokin Z-Pro .9 filter on top of one another.

It was a painful process where you would screw your strong B+W 10 stop filter on first, then screw the filter holder adapter, mount the filter holder on top of this and then finally, slide your graduated filter through the filter holder. Fortunately things have come a long way with neutral density filters and circular polariser filters coming in rectangle form which leads to left stuffing around.

The reason I personally prefer going rectangle is that it makes changing filters a breeze and your process isn’t slowed having to screw/unscrew filters to setup for a shot (not so much when your fingers are frozen!). Instead you’re able to just slide your filters in or out of the filter holder and you’re away (literally a 2-3 second job). Much better. But the old way still works with that said 🙂
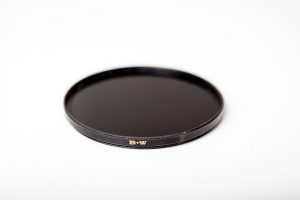
Example of a circular neutral density filter

Quick and Easy to Change

But this isn’t just about me being a princess and feeling the cold, having the ability to quickly change and remove filters is great when shooting with the more stronger neutral density filters (like the 15 stop Lee Big Stopper). 

Due to the filter being so dark, you’re unable to look through the viewfinder and compose your image when the filter is attached. This leads you having to take off the filter to compose and focus your photo and then re-attach. There’s been many times when I’ve accidentally left the autofocus on after screwing my B+W 10 stop and Cokin graduated neutral density filters on and then lost my focus as the camera can’t find a focus point (due to the strength of the filter). This can be especially frustrating when using a rectangle graduated neutral density filter on top of a circular screw filter as you not only have to remove the circular screw filter but also the lens screw adapter and rectangle filter holder. Instead if you were using just a rectangular system, there’s no unscrewing to recompose your image but just sliding your filters in or out. Much more convenient if you ask me! 

Greater Control

Another issue with circular screw on filters is controlling the location of the GND transition. As the transition isn’t as pronounced it can sometimes be difficult to get the GND exactly how you want it especially in low light conditions like sunrise or sunset. For this reason, I much prefer using rectangle filters where the graduation is more pronounced and can be easier to slot into place regardless of light conditions.

What Strength Level?
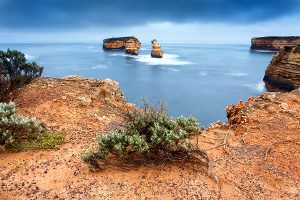
For this image I used a graduated neutral density filter to darken the sky

Neutral density filters come in all levels of strengths from blocking out 1 stop of light all the way up to blocking out 15 stops with the Lee Big Stopper. Deciding on what strength neutral density filter to use depends on your scene in terms of light conditions and what you are trying to achieve. 

If you are simply looking to balance the sunset sky against the land then the strength of your neutral density filter will depend on the light conditions at the time. If you’re shooting at the start of the sunset when there is still strong light, this is when you would look to apply a stronger strength neutral density filter. Towards the end of the sunset is when you would look to pull out a weaker strength neutral density filter as the light starts to fade. 

From personal experience – I’ll generally use my 10 stop filter for the first 15-30 minutes of the sunset but will put it away as the light starts to fade. I find as the light rapidly fades the filter really struggles to capture enough light and you’re left having to increase your ISO to accomodate the low light conditions which introduces unwanted noise. At this point I’ll either use a 6 stop neutral density filter or just shoot wide (F22~) at the lowest ISO possible (ISO 50) to get the slow long exposure times I’m after.
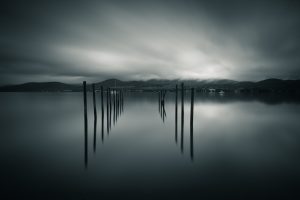
Using a 10 stop neutral density filter allowed me to capture this 5 minute exposure during the day

If you are looking to get creative with your photography and capture long exposures during the day (we’re talking exposure times of a few minutes) then this is when you will pull out the stronger 10+ stop neutral density filters like the Lee Big Stopper or NiSi 10 stopper.

By using these filters which block out a significant amount of light, you won’t be able to see through the viewfinder when the filter is applied due to the strength of the filter which can make composing a bit tricky. 

What is a Graduated Neutral Density Filter?
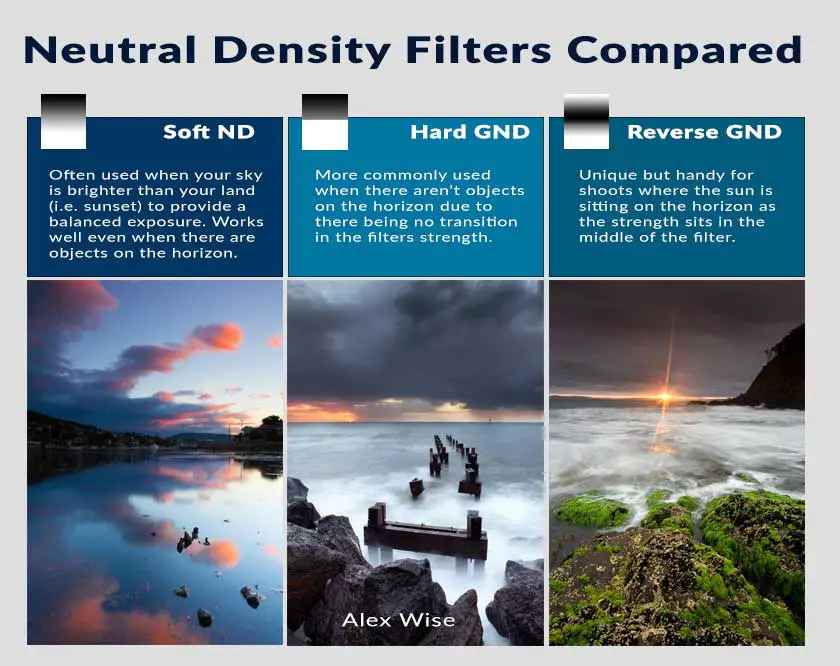
How soft, hard and reverse graduated neutral density filters are best applied.

The difference between a graduated neutral density filter and a solid neutral density filter is that part of the filter will be neutral density (dark) and then transition into transparent (clear). The transition from dark to clear comes in different variations including soft edge, hard edge and reverse graduated neutral density filters which I briefly describe below:

Soft Edge GND
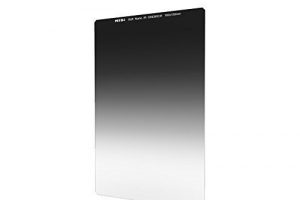
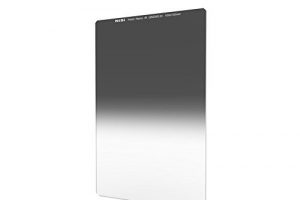
NiSi Soft Edge Graduated Neutral Density Filter

The top part of the filter is 100% neutral density and gradually lowers in strength to 0%.

This is my preferred type of filter and is best applied where your horizon level is uneven and you may have objects appearing above the horizon level. Generally if there are objects above the horizon which become darkened by the soft GND, you can generally dodge (brighten) this back in Lightroom/Photoshop to bring back the detail.

Pros: Great for scenes where you have objects sitting above the horizon as you can position the filter at 90° to avoid the object on the horizon
Cons: The gradual transition can be soft so occasionally you will need to stack multiple soft edge filters to get your desired effect

Hard Edge GND

NiSi Hard Edge Neutral Density Filter

The top half of the filter is neutral density and does not gradually transition to clear like the soft edge graduated neutral density filter. Hard edge graduated neutral density filters are best used in seascape photography when balancing the exposure from the sky to the land.
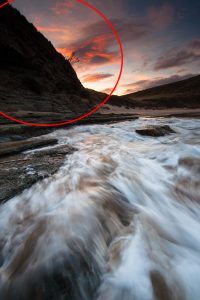
An example of how not to use GND filters. Notice how the filter has darkened the cliff? A big no no!

For best results, I only use hard edge graduated neutral density filters when there isn’t any objects on the horizon (i.e. surrounding cliffs). The reason being is that any objects on or above the horizon will darken which will lead to a loss in dynamic range to your final shot which can be difficult to recover in Lightroom/Photoshop.

Pros: Works great when there are only clouds above the horizon to darken the clouds nicely
Cons: The sharp transition from dark to clear makes these limited to scenes where there are no objects (i.e. cliffs) above your horizon

Reverse Level GND 

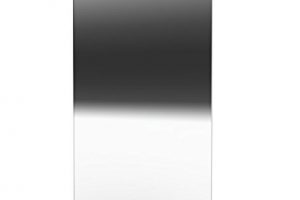
NiSi Reverse Graduated Neutral Density Filter

The reverse level graduated neutral density filter goes from clear at the top, to dark in the middle and then to clear again.

Think of a reverse level graduated neutral density filter as the ideal filter for when the sun is just about to pop on the horizon.  These aren’t as common as other graduated neutral density filters but can be handy when trying to capture the sunburst effect as the sun dips below the horizon.

Pros: Best used for sunset or sunrise photography when the sun is sitting on the horizon
Cons: Only effective when there is a sun bursting on the horizon so they become quite a specialised filter for the price

Are Neutral Density Filters Still Relevant as Technology Advances?

Most definitely!

There are some effects like day time long exposures or shooting directly into the sun on sunset which is only made possible by using neutral density filters like the Lee Big Stopper or NiSi graduated neutral density filter kit. Sure, you can imitate some of these effects in Photoshop with lots of image stacking but it’s not quite the same as capturing the image in camera. 

As technology has advanced I must admit that I’ve found myself using my graduated neutral density filters less as camera sensors have become more forgiving and post processing techniques have evolved with exposure stacking. Not only are sensors coming with higher megapixels but also with greater highlight and shadow recovery which means that you can sometimes get by without needing to use graduated neutral density filters.
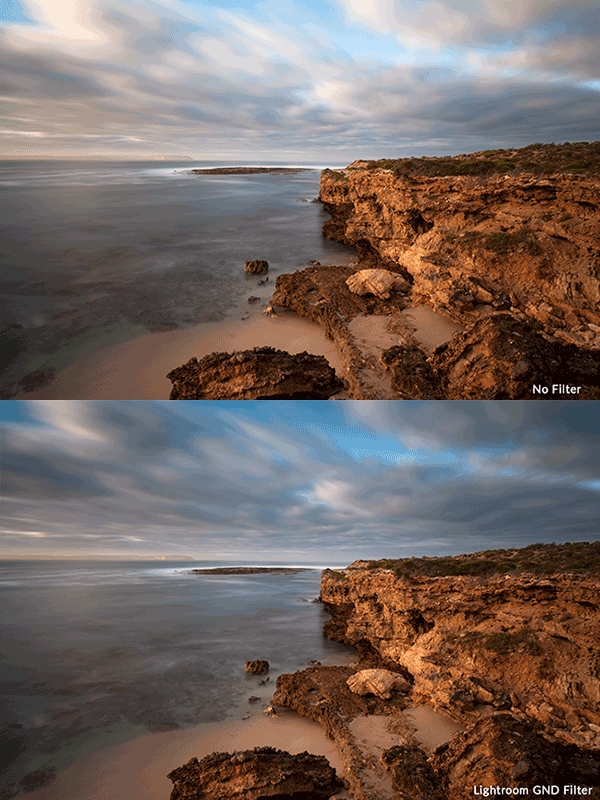
A before and after with the easy to use Graduated Filter in Lightroom

Quite often I’ll apply the same effect in post using Lightroom’s graduated neutral density filter. Sure, this won’t work for every situation (i.e. when you’re shooting directly into harsh sunlight) however for other situations where you’re simply looking to emphasize the colour of a sunset sky, Lightroom’s graduated neutral density tool works great allowing you to decrease the brightness of the sky as you would with a normal graduated neutral density filter. 

Can the a digital workflow fully replace physical neutral density filters? I’ll leave that to another post but in my opinion, no, not at the moment anyway. 

Choosing Neutral Density Filters

Which Filter is Best for You?
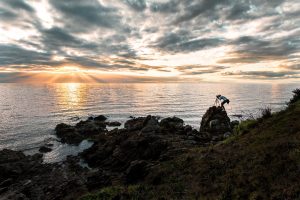
Using a graduated neutral density filter allowed me to properly capture the light bursting on the horizon

Anyone who is serious about landscape photography needs a graduated neutral density filter and at least one strong neutral density filter in their bag. There’s a couple of reasons to why I recommend this:

  1. Flexibility in quickly changing light conditions – Having a strong neutral density filter in your kit allows you to continue taking long exposures in the later stage of a sunrise or early stage of a sunset. I’m not sure about you but there’s been many a times when I’ve photographed a sunrise and stuffed around in the dark for too long and only found a good spot to photograph as the light started to become stronger. At this point of the sunrise, it becomes harder to take a long exposure due to the amount of light hitting your camera meter. By having a strong neutral density filter available, I’m able to put this on my camera and still obtain the effect I’m after like the nice blurry movement of waves crashing against a rock
  2. Balancing harsh light in a scene – We’ve all been there, the sun is beginning to set and you want to capture an image just before the sun dips below the horizon to capture that burst of the suns last light. Unfortunately your camera has other ideas and will struggle to expose the image. This is where a graduated neutral density filter comes in handy and helps you balance the exposure of the harsh sunlight against the land
  3. Creativity – We can’t all be blessed with great light against jaw dropping locations so sometimes it takes a bit more to get that shot. In these situations sometimes I’ll experiment with a strong neutral density filter to capture a long exposure to add a bit extra to the image, whether that be the blur of passing clouds or the movement of the water. 

Neutral Density Filter Buying Guide
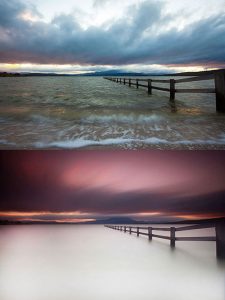
Showing the difference a strong neutral density filter like the Lee Big Stopper can do to your scene with this long exposure image

So taking these reasons to why I love neutral density filters, here are some of my favourite neutral density filters available at the time of writing. Unfortunately neutral density filters don’t come cheap but I’ve tried to make all attempts to include a range in different price brackets.

Like most things in life, it pays to spend and get the best you can afford as this will ensure superior image quality.With the midrange and budget price brackets, the filters aren’t perfect and can introduce colour cast to your image (a purple tinge) when using multiple filters at a time. Part of the reason the high end filters are more expensive is that because they don’t have any colour cast issues like the cheaper filters. 

My recommendation for people looking at the different price brackets and unsure – If you’ve used neutral density filters before and know they will form an essential part of your kit, just buy properly the first time. If you’re sitting on the fence and haven’t used them before, start off with the more affordable range first to see if you get a taste for them before splashing the cash. 

High End

NiSi and Lee are the producers of the best filters in the high end market. For many years, Lee had a firm grip on the market but in recent years, NiSi have started to make a presence with their filters which are slightly more affordable than the Lee range and offer just as good, if not better, quality than the Lee filters. Plus I’m a sucker for Australian based products.

If you want a great set up, I would strongly recommend the NiSi long exposure kit with comes with the required adaptor, a 6 stop and 10 stop neutral density filter. Add a circular polariser and graduated neutral density filter and you will have yourself a very nice kit. 

Yes I agree it is a lot of money to spend on filters but with this setup you will be fully equipped to photograph long exposures during the day, waterfall photography and for sunrise or sunset photography. The perfect kit for a landscape photographer. 

[amazon_link asins=’B01EZ5VCXE,B00MNSS130,B00M24Y6MU,B00KL5PHAC,B00XCHFJMW’ template=’ProductCarousel’ store=’alexwisephot-20′ marketplace=’US’ link_id=’ f80d1787-f75f-11e6-84e7-75c10fbbc909′]

Budget

For those that don’t want to break the bank on the premium end of the market or aren’t sure whether neutral density filters are for them, I’d recommend a mix of filters from a strong long exposure like the B+W 110 10 stop neutral density filter (great for capturing daytime long exposures), a Hoya circular polariser for assisting with reducing the glare and getting a longer exposure time for photographing waterfalls and lastly, a set of Cokin Z-Pro graduated neutral density filters

Contrary to what others say, the Cokin Z-Pro filters are actually good bang for buck provided you know the constraints of the filters. As an example, if you stack all three graduated filters at once, you will get some harsh purple colour cast coming through the filters meaning an unwanted purple colour at the top half of the frame which you may or may not want. I’m assuming you may not want… Although I may have cheated a few times and used the colour cast to my advantage for dull sunsets… 

[box type=”info” style=”rounded”]If you really want to experiment with long exposure photography on the cheap why not DIY a neutral density filter with welding glass?[/box]

[amazon_link asins=’B000T95Q8I,B00485ZJB8′ template=’ProductGrid’ store=’alexwisephot-20′ marketplace=’US’ link_id=’ f8a4868c-fae7-11e6-80b2-f907ad690a64′]

Examples of Long Exposure Photography
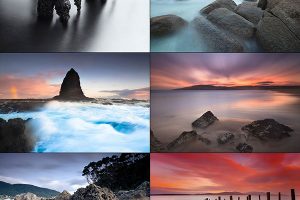
Examples of different long exposure photographs

Some of my favourite long exposure photographs are of water (I love the sea if you can’t already tell by expanding the image to the right) but there are plenty more options whether it be long exposures of traffic at night or capturing the movement of clouds at a location over the period of 5-10 minutes (creates a cool effect!).

[box style=”rounded”]Looking for ideas to plan your next shoot? Give my long exposure photography ideas post a read for some ideas and inspiration[/box]

Most of the images in the right image were made possible by having neutral density filters which allowed me to take 5~ minute long exposures during the day. They allowed me to turn an otherwise dull scene into something different and unique from the effect of a long exposure (like the pylons beneath the jetty).

End

I hope this buying guide for long exposure filters has been useful and answered some questions. Please don’t hesitate to reach out via my contact form if you have any questions as I’d be more than happy to help where I can.

Thanks for reading,

Alex
 

Posted on 4 Comments

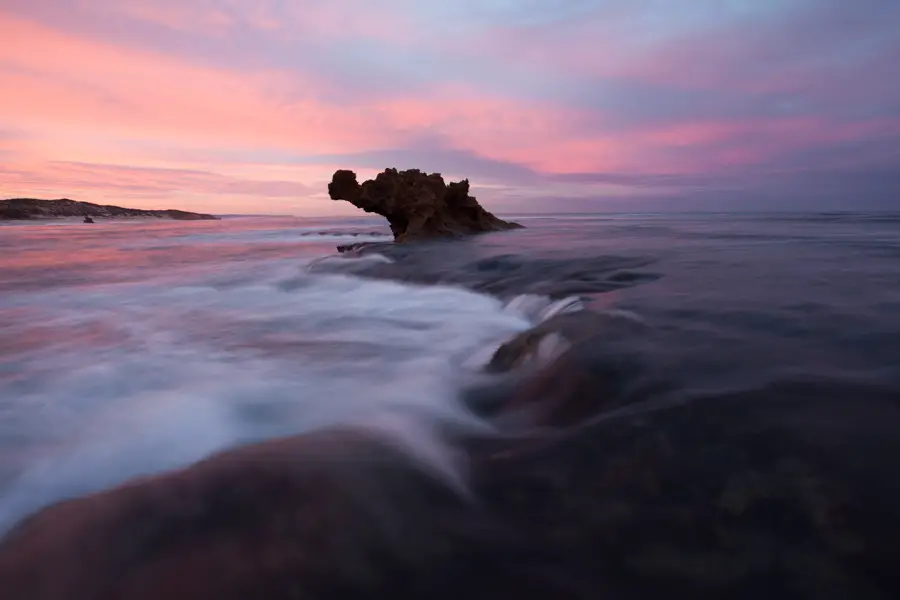
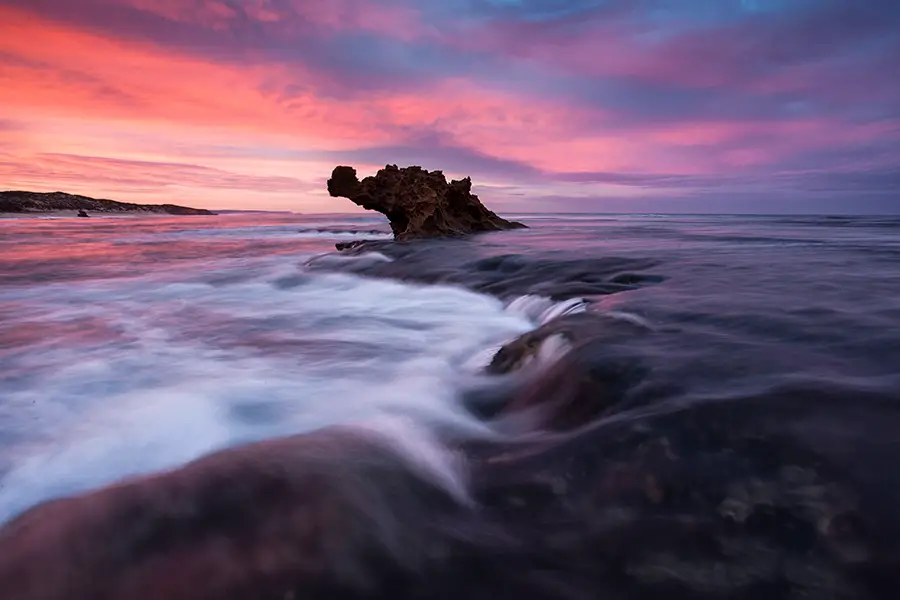
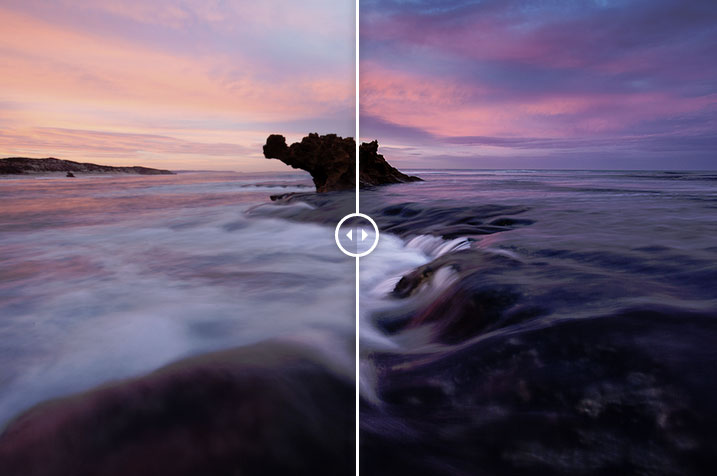
Before and After – Dragon’s Head, Victoria

[twentytwenty]beforeafter

[/twentytwenty]

Dragon’s Head is located at  Number Sixteen beach, Rye, Victoria and has been on my to do list for a while now. A few months ago, I finally got around to shooting it with an early start for a sunrise shoot. Having not been to the location before, walking out the rock ledge, dodging the little rock pools and trying to find a good angle of the ‘Dragon’s Head’ without taking an accidental swim made for a rather different but enjoyable way to start my Saturday morning.

Finding an Angle

Composing my image I clearly wanted to make the ‘Dragon’s Head’ the key part of my image. But with this in mind, I needed some other things in the photo to balance the photo out and give it my own personal touch. That’s not to say someone before me hasn’t taken the exact same photo but I needed something more than just a photo of the object. For this reason I opted to use the water cascading over the small rock ledge as a foreground element and leading line to the Dragon’s Head. Getting this angle required me to get low and a few attempts until the right surge of water came across (and a few yanks of the camera to safety.. Crisis averted luckily ;)).

In person, Dragon’s Head is actually quite small, so much so, it took me a bit of stumbling around in the dark with the head torch to actually notice it. For this reason, I really had to leverage traditional composition techniques by using a leading line, in this case, the water cascading over the rock ledge to lead the viewer to the rock. I think it worked well but I’d be keen to hear otherwise.

Shooting the Image

The photo was shot with a Canon 5D Mark II, Canon 17-40 and Cokin Z-Pro graduated filter with a 2.5 second exposure at F/16. Using the graduated neutral density filter was useful for holding back the sun rising to the left of the frame which would have otherwise created a partial highlight in the left of the frame. Through using a graduated neutral density filter for this part of the shot, this allowed me to not get any highlights in my sky while maintaining a good exposure of the bottom of the frame. I find this provides you with more of a neutral/flat look to your straight out of camera image but gives you a lot more space to work with when it comes to post processing the image.

Post Processing the Image

Working with a photo of a sunrise which doesn’t have any sharp highlights or shadows saves a lot of time when it comes to post processing. For this reason, post processing for this image of Dragon’s Head was processed in Lightroom and included:

  • Straightening the image
  • Applying a graduated neutral density filter in Lightroom to darken the sky and further bring out the sunrise colours
  • Using the adujstment brush to paint over the Dragon’s Head and the bottom of the frame to make both appear brighter
  • Simple curves adjustment over the whole image adjusting the shadows, midtones and highlights to give it a bit more of a punchy contrast

Without going overboard on an image that could have almost passed straight out of camera, that was the extent of the processing and that was that.

Thanks for reading and if you ever get a chance, be sure to visit Dragon’s Head down at Rye on the Mornington Peninsular on sunrise. A stunning place.

– Alex

Posted on 2 Comments

Before and After – AAMI Park

[twentytwenty]

Aami Park 1 Aaami Park 2
[/twentytwenty]

Capturing the Photo

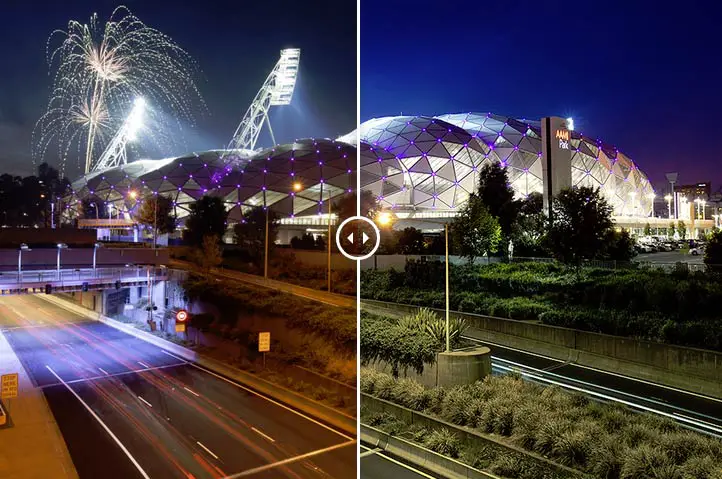
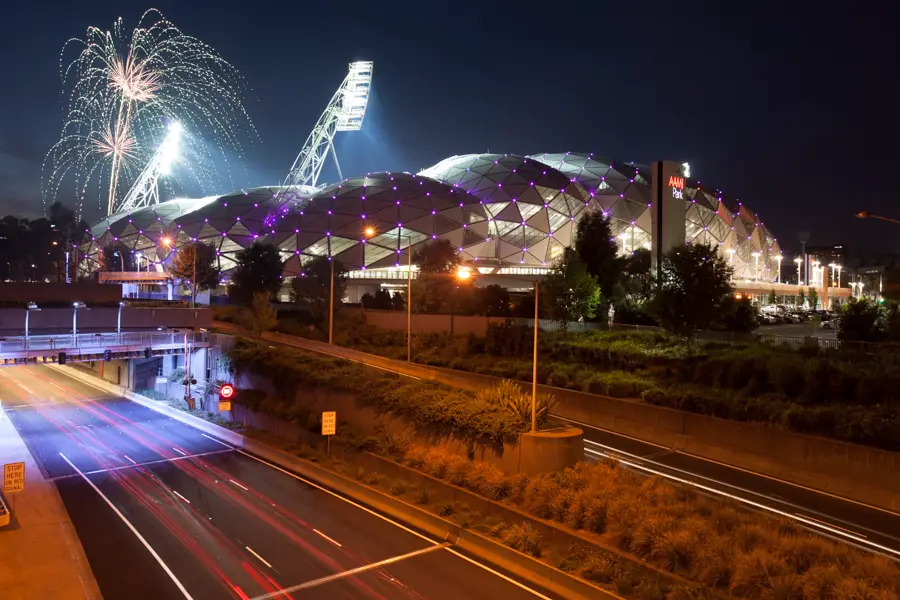
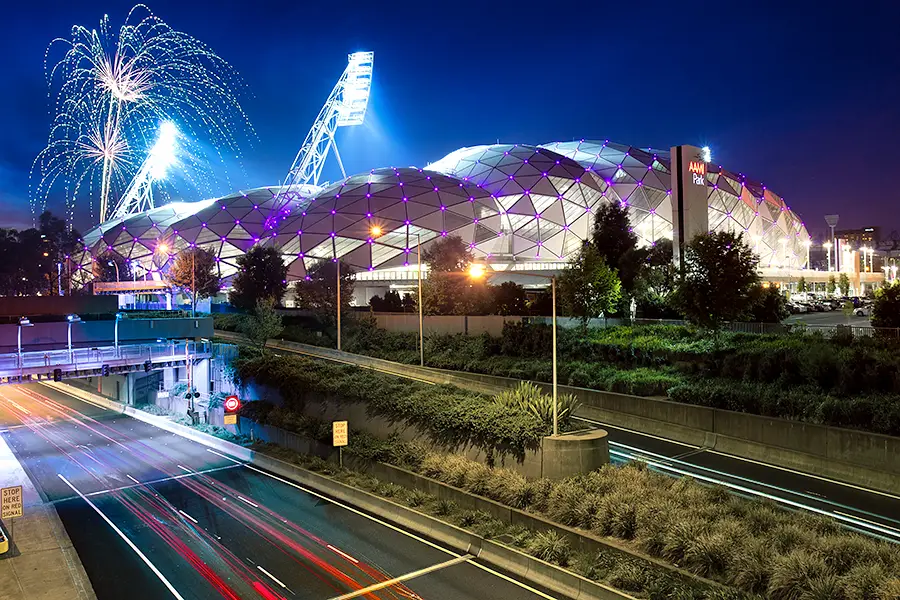
Fireworks at AAMI Park as captured in 2011 during a sports game at one of Melbourne’s iconic sports venues.

After passing by it on my commute every day to work, I’d always wanted to capture a long exposure of the traffic going beneath the bridge with the stadium all lit up with a game being on. Timing for this photo was key where I wanted it to be a clear forecast so I could get a nice blue sky around blue hour.  I waited a few weekends where an event would be on but the forecast wasn’t really on my side. Eventually I got lucky with the forecast and luckily there was a time playing so decided to pounce. The plan was to arrive just on sunset to setup and capture an image around blue hour which would provide a nice even light over the scene and allow me to capture the lines from the constant flowing traffic beneath.

Various photos taken over the night.

It was by luck that AAMI Park uses fireworks for when a team scores a goal. Even more lucky was that many a goals were being scored. I have to be honest – photographing fireworks isn’t my strong point and I really wanted to capture it in one image rather than blending the fireworks into the shot. Thanks to the fireworks going off every 5-10 minutes it let me get the right photo eventually in a 20 second exposure at F/13. For this photo I used the Canon 5D Mark II, Canon 17-40 and a tripod.

Processing the Image

The challenge for this photo (and something I find a lot when shooting night time) is battling the warm temperatures of the street lights. For this image, I could of edited it entirely in Lightroom by using the adjustment brush and saturation but I wanted a greater level of control over the image where I could make small-scale changes to a small selection without affecting the overall image.This is where I encourage the use of layer masks in Photoshop due to their ability to allow you to make selective changes to an image. Want to increase the saturation of just the reds of the traffic flowing past without increasing the saturation to other reds in your image? Layer masks is your answer.

[box type=”info” style=”rounded”]More information about layer masks and blending can be found in an earlier post about layer masks on my blog[/box]

Using layer masks on the bottom half of the image, I used a mixture of selective saturation changes, curves channel changes (adjusting the Red channel shadows and mid tones to reduce the red) and introducing a cold photo filter . I’m probably not 100% with the bottom half of the image but much prefer it over the original image where the lights create a high temperature over the scene.

With the high temperature traffic lights cooled down I then went about editing the sky and stadium. The changes here were quite simple and included:

  • Saturation boost and brightening the sky – With the intention of capturing the image on blue hour I really wanted to bring out the sky to emphasize the blue hour feel. The sky in the raw was quite flat (notice how the light drops off near the stadium lights) so I used the dodge feature in Photoshop to brighten the sky and to also bring out the fireworks more. With this done I then set about boosting the blues of the sky with a saturation mask
  • Colour correcting and brightening the stadium – As  I had the camera set to auto white balance, this left a warm and inconsistent colour temperature across the whole scene. To correct this, I set about creating a curves layer, opening the red channel and reducing the reds in the shadows and mid tones. The key here was to remove the reds from the stadium to make it appear its natural white colour. In addition to this, a saturation layer was created to lower the saturation of the stadium. Once again, a layer mask was used here for both layers to ensure the reduction to the red channel and saturation was only made to the stadium and not other parts to the scene. Once this was completed, I then went about dodging the stadium to brighten it
  • Straighten and perspective correction – I must admit, it’s rare that I’ll get my horizons 100% straight. Luckily it’s easy to quickly fix in Adobe Photoshop by selecting the ruler tool, running it along the horizon of the image and then selecting Image > Image Rotation > Arbitrary. With this complete I also used the lens correction tool in Photoshop which corrects distortion based on your lens profile. This can be found in Filter > Lens Correction

And that’s it really. For this image the most important thing was getting as much correct in camera as possible. Sure the colour balance could have been set to manual to avoid having to re-correct in post but through getting the fireworks and everything in one shot made post processing a lot easier.

Hope this post was useful for you and as usual if you have any questions or feedback I’d always love to hear from you.

Thanks for reading,

– Alex

Posted on 4 Comments

Before and After – Secret Falls, Tasmania

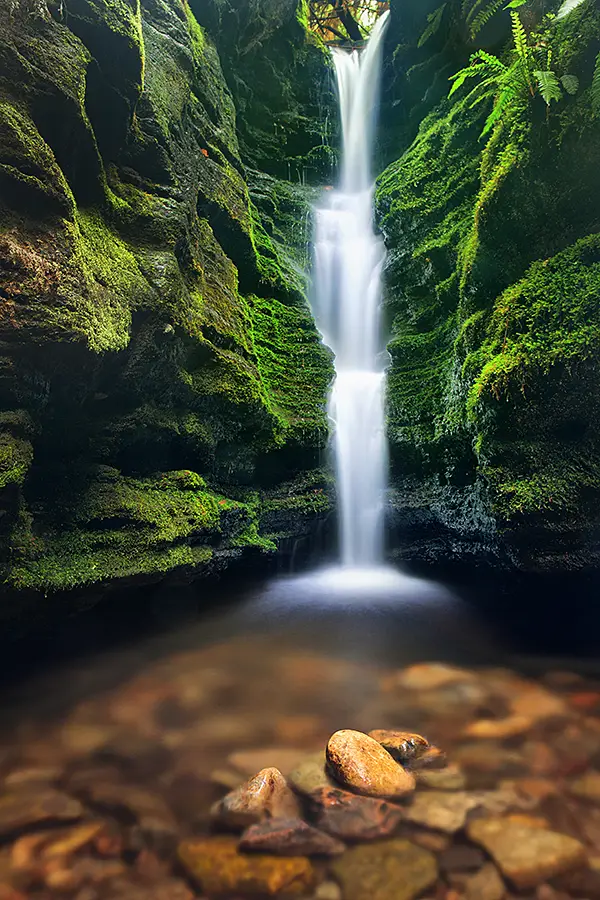
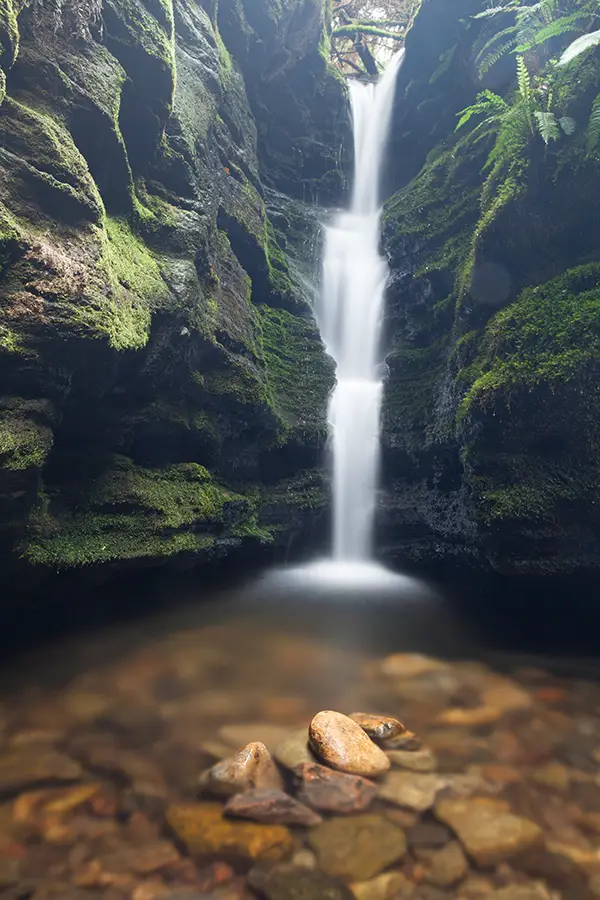
Secret Falls, Tasmania

Secret Falls has been on my to photo list for some time after visiting it a few years ago with a friend when bushwalking through the area sans camera. It’s a beautiful little waterfall that does live up to its name even if the location isn’t really quite a secret if the amount of people photographing it is anything to go by…

The location of Secret Falls is a ‘secret’ and probably best not published here but I’m happy to disclose if you drop me an email.

[twentytwenty]

IMG_9660 copy IMG_9661 copy

[/twentytwenty]

Taking the photograph

Based on the popularity and small size of the waterfall it made things especially difficult to get a unique take on the waterfall. Something as photographers, we are forever striving for, to get our own unique capture of a scene. With this in mind, I decided to get a bit wet and assemble some rocks in the middle of the foreground with the intention of capturing a long exposure that would blur the water as it passed the rocks. Are moving rocks around in a scene to create a composition cheating and take away the authenticity of a scene? I’d argue no but would be interested to hear if others feel otherwise.

With the scene setup, I set up my gear (Canon 5D Mark II, Canon 24-70, Hoya circular polariser and manfrotto tripod) and began taking some test shots of the scene. It’s interesting, a friend and I were having a discussion recently about focus stacking and the notion of using multiple photographs at varying focus levels to maximize the sharpness of an image. I laughed it off and said it would be rare for me to ever need to do this but what do you know, a week later, I was putting the theory into practice swallowing my naysaying words and using the technique for this shot. The reason I opted to focus stack this image was the difficulty in having both the foreground and background rocks sharp. Generally, shooting wide with an ultra wide angle lens and high depth of field (f/11 onwards) it’s rare to run into this issue but by using the 24-70 which isn’t quite as wide my normal go to lens, the Canon 17-40, it was difficult to get the whole scene in focus.

Focus Stacking

Focus stacking works under the same principal as exposure blending in which your camera is set up on a tripod and you take various exposures or in this case, different focus levels which is then selectively combined into the final image. For this image of Secret Falls, I took a reading in aperture priority mode and got a reading at f/13. This gave me an exposure time of 25 seconds. I changed the camera to manual mode and dialed in f/13 and 25 seconds. The reason for changing to manual mode is to avoid any variation in exposure that aperture priority may have introduced. With the camera set in manual mode, I focused the image on the foreground rocks and then took another image with the focus selected on the background. This left me with two images that I would then need to blend in Photoshop.

Processing the Images

Getting the photo as right as much as you can when taking the photo makes post processing the image far more easier. By using a circular polariser when capturing the photos, this increased the saturation slightly, reduced glare on the water and allowed me to get a longer exposure time. With the two images captured loaded in Photoshop (one with the background in focus and another of the rock in focus) I loaded both images into Photoshop and made the following changes.

  • Focus stacking – As mentioned above, two images were taken for the purpose of focus stacking, one for the rock in the foreground and another for the foliage in the background. Using layer blending, I used the background (foliage focus) image as my primary image and then introduced the second frame (focus of the rock) into the shot through layer masks
  • Curves layers – Using a combination of curves and layer masks has become my go to for selective colour grading and brightness/contrast changes to an image. As an example from this image, I selected the green channel and bumped the shadows of the image to really bring out the green around the waterfall. This introduced a strong green colour cast to the whole image, which was mitigated through using layer masks and isolating the strong green to only being present in the foliage area around the waterfall. Similar changes to the image were made to the blue channel to bring out the blues of the waterfall and also to make selective dynamic range increases to the image
  • Saturation and hue – When making changes to saturation, I rarely make changes to the saturation as a whole and prefer to make changes to individual colours for greater control over the image. For this image, I was particularly keen to play with the greens and reds saturation and hues until I got the desired effect I was after. The idea was to give the water a warmer feel around the rocks and give the greens a stronger hue
  • Spot removal – Don’t laugh or cringe but I’ve become a sucker for the content aware tool that was introduced a few revisions ago in Photoshop. Selecting the area where a spot had got on my lens from the rain, I filled the area with the content aware tool and it worked a treat
  • Resize and sharpen for web – Finally I resized the image to 900px/72 dpi at the longest edge and used the unsharpen mask (USM) tool to sharpen the image. Once again, I like to use layer masks when sharpening an image as it allows me to be selective in my sharpness adjustments to a scene. With some minor sharpness adjustments through layer masks the image was complete

Processing this image was fun. It’s always nice to put a new technique like focus stacking into play to see how it works and can benefit an image.

Where is Secret Falls?

Update – I’ve decided to add this section after receiving regular emails asking for the location of Secret Falls. When originally writing this article I was questioning whether to include the location of Secret Falls or not. For me, not disclosing the location had nothing to do with keeping the whereabouts of this small waterfall an enigma but more to do with the environmental impact which disclosing may create.  For this reason, when accessing Secret Falls be mindful of the impact you have and follow an existing path rather than creating a new. Potentially this will ruffle feathers with some but this location has been known for years and should be shared for others to enjoy.

Google Maps screenshot of the route to Secret Falls
Google Maps screenshot of the route to Secret Falls. Click for larger.

The location of Secret Falls is conveniently located near the CBD of Hobart just up from the Cascade Brewery. The location of Secret Falls is at the end of Old Farm Road which you enter via Cascade Road.  The drive from Cascade Road to the end of Old Farm Road takes roughly 5 minutes and will eventually lead you to a carpark which I believe for memory is the Old Farm Fire Junction. Walk towards the Junction and you will have 3-4 bushwalks going in varying directions. When I first visited Secret Falls with a friend, we had no idea which path to take and walked most of them in the search of Secret Falls. It was quite tragic but was a nice afternoon out. So to avoid our mistakes, avoid taking the far left or far right tracks. These will not take you to Secret Falls.

The location of Secret Falls is along the Myrtle Gully Falls track and roughly 100m from the Myrtle Gully waterfall itself.  Unfortunately it’s difficult to be specific on the exact location of Secret Falls as it is well hidden by undergrowth and deep gully however the best indication is to keep an eye out for a track that goes down the embankment created by bushwalkers/photographers when accessing the waterfall.  If you’ve made it to Myrtle Gully Falls, you have gone too far and need to retrace your steps back a little. As said earlier in the post, please be respectful of the environment as you are making your way to the waterfall and follow the path that others have created rather than creating your own.

Thanks for reading and if you have any questions feel free to drop a comment or email as I’d be happy to help further.

– Alex

Posted on

Before and After – Southbank Overpass

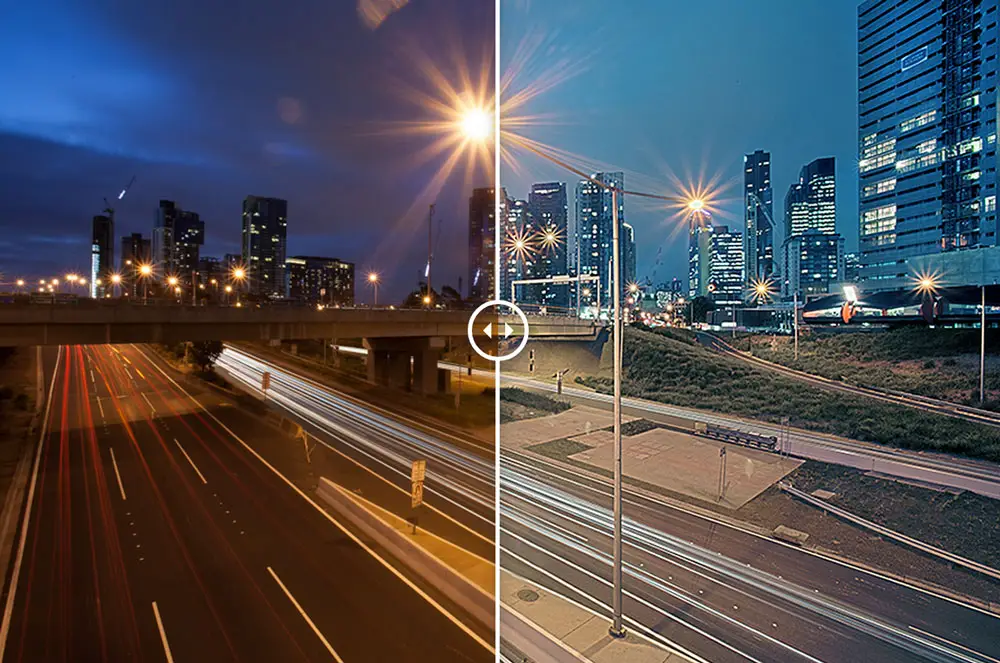
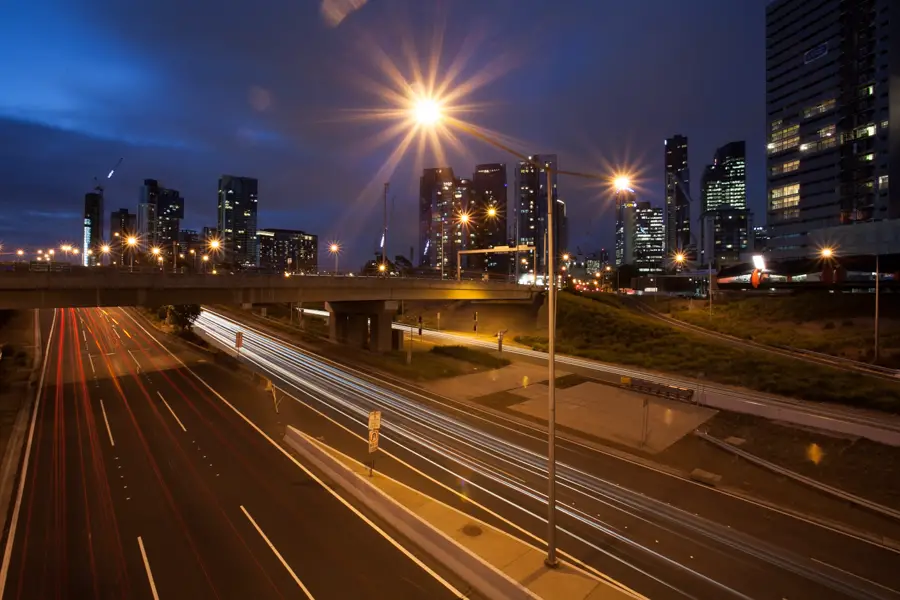
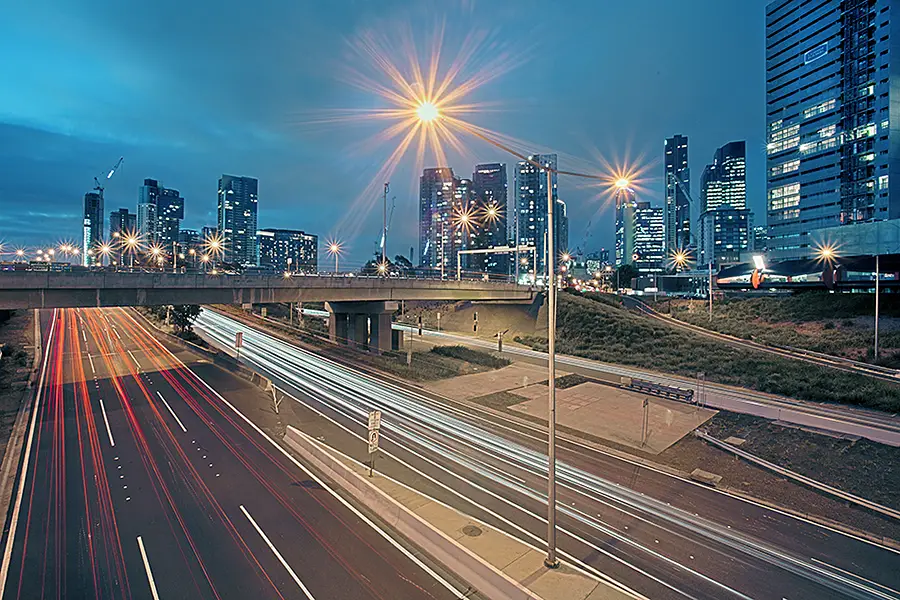
This photograph was captured from a busy overpass in Southbank, Melbourne. Coming from Hobart where traffic is let’s be honest – quiet, I’m forever looking for city overpasses that provide a good vantage point that overlooks the busy and constant flow of traffic entering and exiting Melbourne. I’d like to share the before and after for this image as there’s quite the difference between the two.

[box size=”large” style=”rounded”]This photo forms part of my Before and After Series. Be sure to check out previous posts of this series[/box]

Southbank, Melbourne on Blue Hour

[twentytwenty]

Southbank 1

Southbank 2

[/twentytwenty]

Capturing the Photograph

Southbank-Overpass-BracketGenerally when shooting traffic from an overpass that doesn’t have a constant flow of traffic, I will slightly cheat and set my camera to manual mode and fire exposures as each big burst of traffic goes through my scene. The reason for doing this is it allows me to combine the larger flows of traffic into one photo to give a sense that the road was busier than it actually was.  It’s probably not ethical but coming from Hobart where the highways aren’t high flowing like huge cities, sometimes we have to use any trick up our sleeves to get the photo we’re striving for.

Luckily though this wasn’t needed on this occasion as I was overlooking one of the busier highways in Melbourne where there is an abundance of trucks and cars constantly flowing under the overpass.

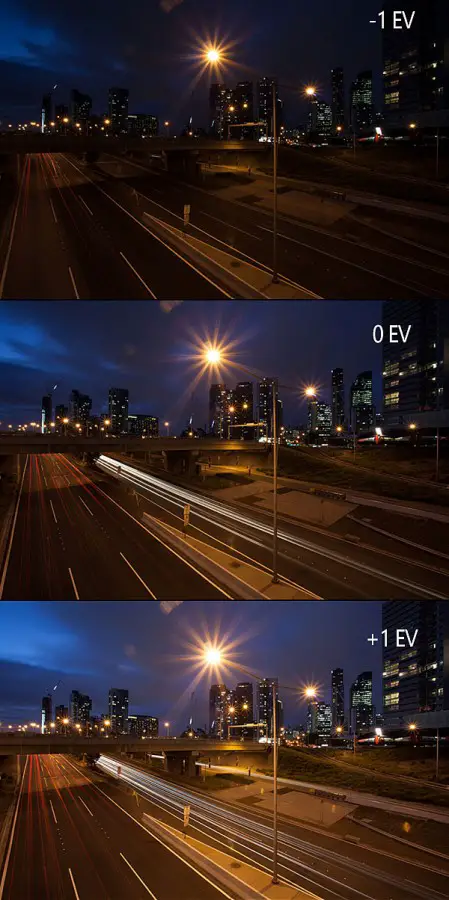
The photograph was taken after sunset on blue hour. I find blue hour is perfect for shooting long exposure cityscape photos as there is still a lot of natural light which the camera picks up through long exposures that may not be visible to the naked eye. Although there was a lot of light still about, I wanted to ease on the side of caution and capture multiple exposures at different exposure values. By this I mean, I wanted to capture an under exposed, neutral exposed and over exposed image.  No no, before you ask, not to create a HDR image but to err on the side of caution. Although shooting at this hour provides a lot of available light that may not be visible to the natural eye, it still doesn’t overcome the issue that there was some dynamic range drop off around the buildings and dark points of the overpass where the over exposed image would be useful.

Using Automatic Exposure Bracketing

For this reason I set the camera into automatic exposure bracketing mode (AEB) and set the camera to fire at various exposures. This is quite a useful tool for when you are shooting and don’t want to risk missing the right dynamic range.

[box size=”large” style=”rounded”]Further information about Automatic Exposure Bracketing (AEB) can be found on a previous post of my blog which explains how to use it on your camera and when it can be useful[/box]

With the images captured at varying levels of exposure, I was quite content that I had the image I was after and set off home to process the images.

Editing the Images

Opening the images in Lightroom, I was glad to have taken multiple exposures and decided to use the +1 over exposed image as my neutrally exposed image was slightly too dark. Instead, the over exposed image provided a good level of dynamic range without blowing out any highlights while bringing out detail in the shadows.

Upon editing the image, it was quickly apparent that the surrounding lights had warmed the RAW temperature of the image to a level that didn’t accurately reflect the scene. Normally I would drop the colour temperature within Lightroom but opted to go straight to Photoshop for colour grading.

I’m quite fond of using Photoshop for colour grading of my images through using Curves to make this change. Curves is super powerful as it allows you to isolate your changes to the shadows, midtones and highlights of the red, green and blue channels of the image.  Through using this tool, it provides you with the ability to have great control over the tones and contrast of an image. For example, in this image I used Curves, selected the red channel and made changes to the shadows to correct the colour temperature. For more example about Curves, Adobe’s website has some [ilink url=”http://helpx.adobe.com/photoshop/using/curves-adjustment.html”]great information[/ilink] about using the tool.

For the most part, the final image involved a lot of back and forth edits in curves with layer masks to subtly introduce different parts of the curves to parts of the image. This generally meant bumping the shadows then layer masking it to a particular part of the image (i.e. boosting the shadows for the under pass of the image).

If you enjoyed this post be sure to check out my other posts in this [ilink url=”http://www.alexwisephotography.net/blog/category/technique/before-and-after-technique/”]Before and After Series[/ilink] or if you’re feeling brave, give me a follow on Twitter or Facebook 😉

Thanks for reading.

– Alex